
USB flash drives (a.okay.a. “thumb” drives) could appear passé in a world the place AirDrop and cloud storage clear up the file-transfer drawback. However they’re nonetheless fairly helpful for handing over information to a different consumer when your Macs should not close by, for shifting very giant information, and extra. You may even use them to offer a PC consumer a file out of your Mac and vice versa.
Whenever you get a brand new flash drive, you possibly can plug it in and it’ll present up in your Desktop, no matter how the drive is formatted. (Chances are you’ll be requested to permit the accent to connect should you’ve arrange macOS’s System Settings for Privateness & Safety > Equipment that manner.) Nevertheless, it’s best to contemplate reformatting that drive earlier than you utilize it. There are different codecs out there that might be higher suited in your wants.
On this article, we’ll go over the totally different codecs and why you’d choose one over the others. When you be taught concerning the codecs, you possibly can choose one and format your USB flash drive appropriately. In case you are available in the market for an exterior SSD system, learn our Greatest Picks for Exterior SSDs.
What’s a file system format?
Earlier than we cowl the totally different file system codecs, it’s essential to know what a file system format is within the first place. It’s principally the best way a pc manages information on a storage system. Completely different working techniques (macOS and Home windows, for instance) help totally different file system codecs, and every format gives its personal options.
There are 4 totally different codecs you need to use on a USB flash drive. The kind of file format you choose relies upon totally on what computer systems you intend to make use of the drive with. Some codecs can be utilized on totally different working techniques, whereas others can be utilized solely on one OS. It’s essential to select a format that most closely fits how you intend to make use of the USB flash drive.
For Mac-only storage units: APFS
APFS is the Apple File System, which is presently the default format. It was created with flash drives and SSDs in thoughts. These kinds of storage units use chips that may put on out over time, although that will depend on how typically information is written to the chips. For many customers, an SSD or flash drive will final past your means to make use of it. To assist forestall put on and tear, APFS is designed with writing effectivity in thoughts to delay a tool’s well being.
APFS gives different options, reminiscent of robust encryption, area sharing, snapshots, and extra. It additionally gives on-demand disk area allocation for a partition. Macs with inside SSDs should be formatted with APFS.
Whereas APFS was made for SSDs and flash drives, it may be used with onerous drives, however a couple of experiences state that you could be expertise barely slower efficiency. You need to think about using Mac OS Prolonged as a substitute (see under).
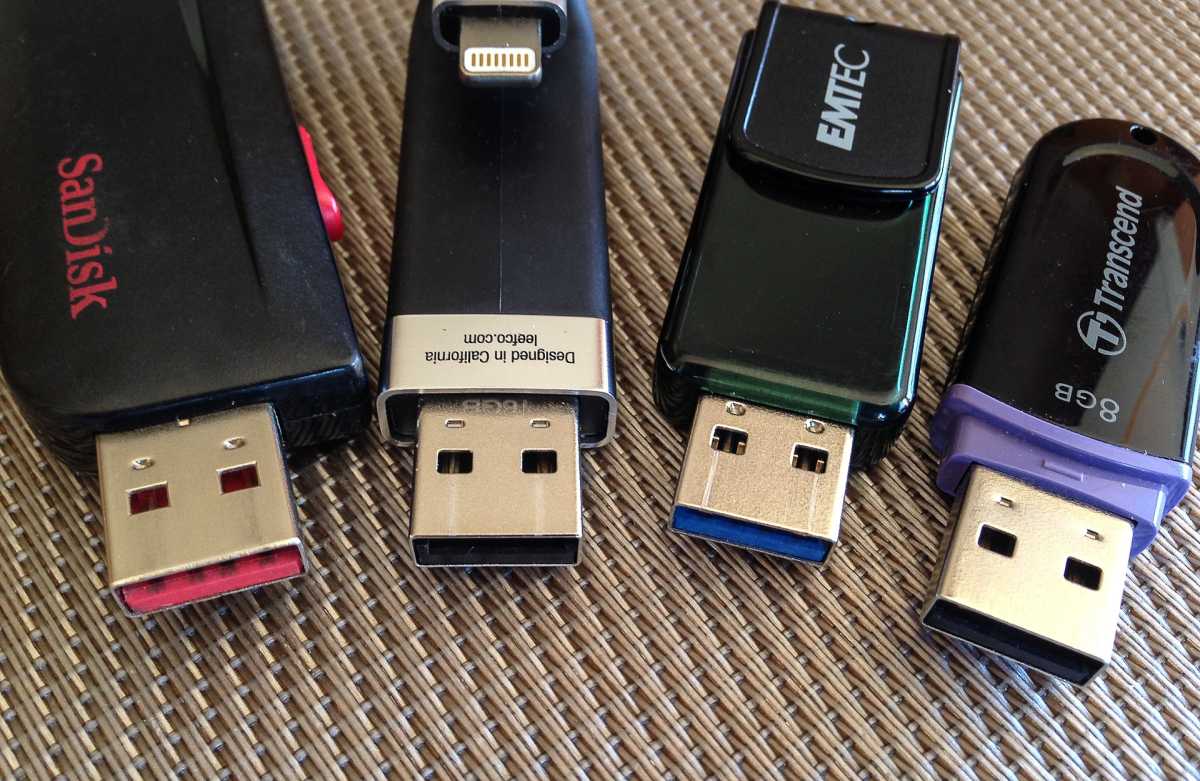
These USB-A flash drives want a USB-C adapter for use on most fashionable Macs.
Jacqueline Macou / Pixabay
APFS was launched in macOS 10.13 Excessive Sierra, so Macs working an OS older than that won’t be able to acknowledge an APFS-formatted drive. For these older Macs, you have to use Mac OS Prolonged (see under).
Drives formatted with APFS can be utilized solely on Macs working macOS 10.13 Excessive Sierra or later. APFS drives can’t be used with Home windows PCs. Study extra about APFS.
For older Macs and Mac-only onerous drives: Mac OS Prolonged
Earlier than there was APFS, there was Mac OS Prolonged, also called HFS+ (Hierarchical File System +). It was created at a time when onerous drives have been the dominant type of storage, internally or externally. It was launched in Mac OS 8.1 in 1998, when it changed HFS (Hierarchical File System), the unique Mac file format.
HFS+ lacks a few of the options of APFS that have been created to enhance effectivity on SSDs, so HFS+ might influence an SSD’s or flash drive’s pace. Additionally, this lack of effectivity impacts the damage and tear on flash reminiscence.
Since Mac OS Prolonged was created for onerous drives, it’s finest used for such, even on in the present day’s Macs. Any onerous drive, SSD, or flash drive that shall be used on Macs with macOS 10.13 Excessive Sierra or older should use Mac OS Prolonged. Storage units for Time Machine should be formatted with Mac OS Prolonged.
Storage units formatted with Mac OS Prolonged can be utilized solely on a Mac. In order for you to have the ability to join a storage system to a Home windows PC, you have to use exFAT or MS-DOS (FAT).
For Mac and Home windows: exFAT or MS-DOS (FAT)
If you wish to use your USB flash drive with each Macs and Home windows computer systems, you’ve two file codecs to select from: exFAT or MS-DOS (FAT). “FAT” stands for File Allocation Desk, and exFAT is a more moderen model, whereas MS-DOS (FAT) is older.
MS-DOS (FAT)’s main limitations are that it can’t retailer information bigger than 4GB, and its most partition dimension is 8TB. Nevertheless, MS-DOS (FAT) drives can be utilized on all variations of Home windows. ExFAT has a most file dimension and partition dimension of 128 petabytes, however it may well’t be used on Home windows variations older than Vista.
Which one to make use of? Use MS-DOS (FAT) except you’re employed in video, giant databases, pictures, or the rest that creates giant information, or you’ve a flash drive that’s bigger than 8TB and you do not need to divide it into a number of partitions. In truth, your USB flash drive might be already formatted with MS-DOS (FAT)–most are. In any other case, use ExFAT.
In case you are utilizing a Home windows PC to format a flash drive, you’ll discover a third alternative, NTFS. Macs can learn NTFS drives, however they will’t write to them with out particular third-party software program. Apple’s Disk Utility can’t format drives as NTFS. Additionally learn: The way to format a USB thumb drive for each Mac and Home windows.
For different units: MS-DOS (FAT)
If you have to use the flash drive with one other system, reminiscent of a TV, use MS-DOS (FAT). For instance, you would possibly need to switch a video out of your Mac to your TV. Otherwise you downloaded information wanted to improve a tool with a USB port. Since MS-DOS (FAT) is so common, likelihood is these units are appropriate with it.
Choose a partition scheme
Okay, so that you’ve found out which file format system to make use of. However wait! There’s another factor to determine: the partition scheme, or “Scheme” because it’s referred to within the Disk Utility app.
A partition in storage parlance is a bit of a storage system. For instance, when you’ve got an 8TB drive, you possibly can determine to format it into one partition of 8TB, and it might seem in your Mac as one 8TB drive. Or you possibly can determine to partition that drive into, say, two 4TB partitions, and you then would see two 4TB drives in your Mac. The scheme tells the pc how the information are organized.
Within the Disk Utility app, there are three schemes from which to decide on:
- GUID Partition Map: for all Intel and M-series Macs. Select this one if you don’t plan on utilizing the drive with a Home windows PC. Later variations of Home windows can use this scheme, however you’re higher off utilizing…
- Grasp Boot Document: this scheme works on Home windows PC and Macs.
- Apple Partition Map: use this provided that you’re going to make use of the drive on an previous Energy PC Mac.
The way to format a USB flash drive for Mac
Formatting a USB flash drive (or any storage system) could be performed with the Disk Utility app, which is present in Functions/Utilities. These are the steps to format the drive.
- Time to finish: 5 minutes
- Instruments required: macOS (Sequoia proven right here; the steps are comparable in older variations)
- Supplies required: USB flash drive or different exterior storage system
Disk Utility
Foundry
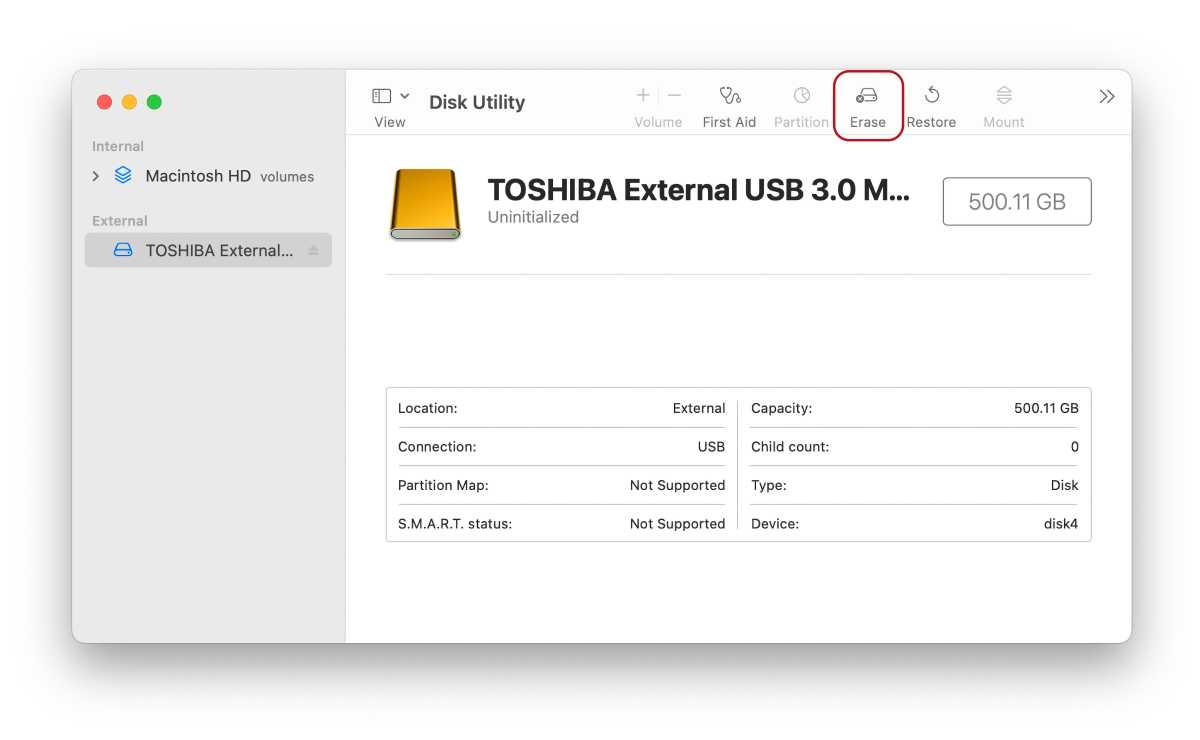
In Disk Utility, choose your USB flash drive within the Exterior part of the left column. Click on the Erase button.
Identify, Format, and Scheme
Foundry
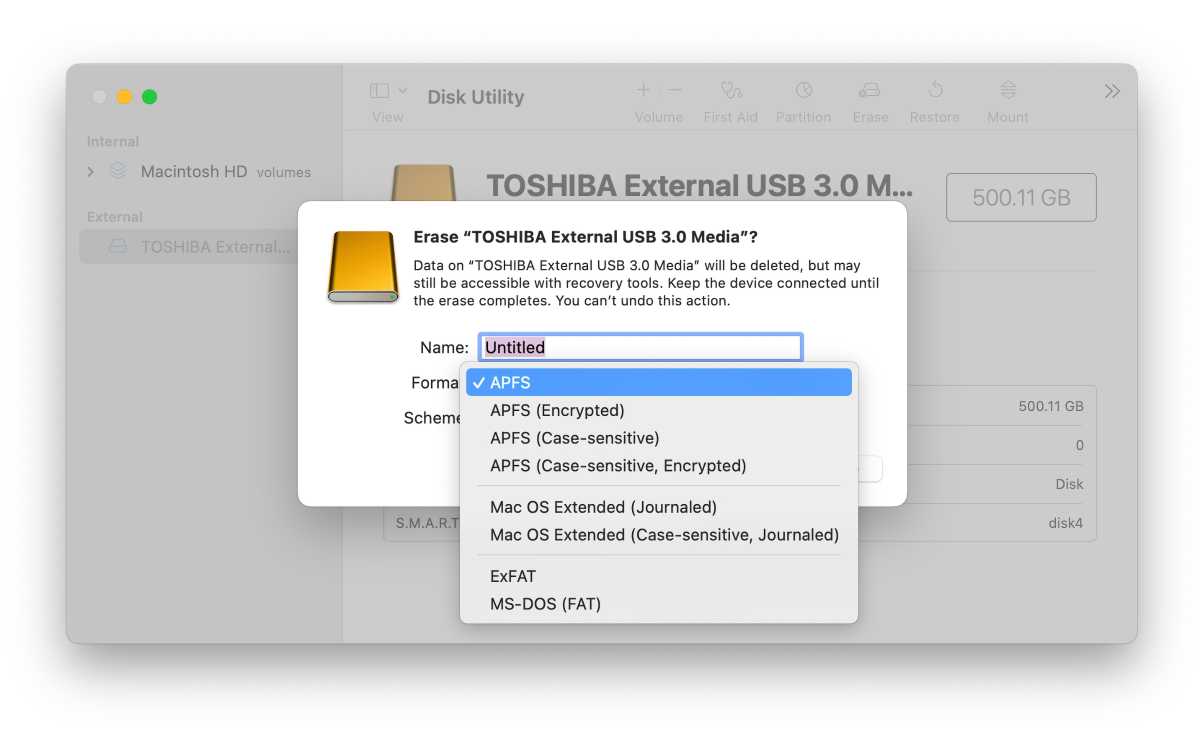
- Give your drive a reputation within the Identify subject.
- Click on to increase the menu underneath Format to pick your format sort.
- Click on to increase the menu underneath Scheme to pick your partition scheme.
Erase the drive
Foundry
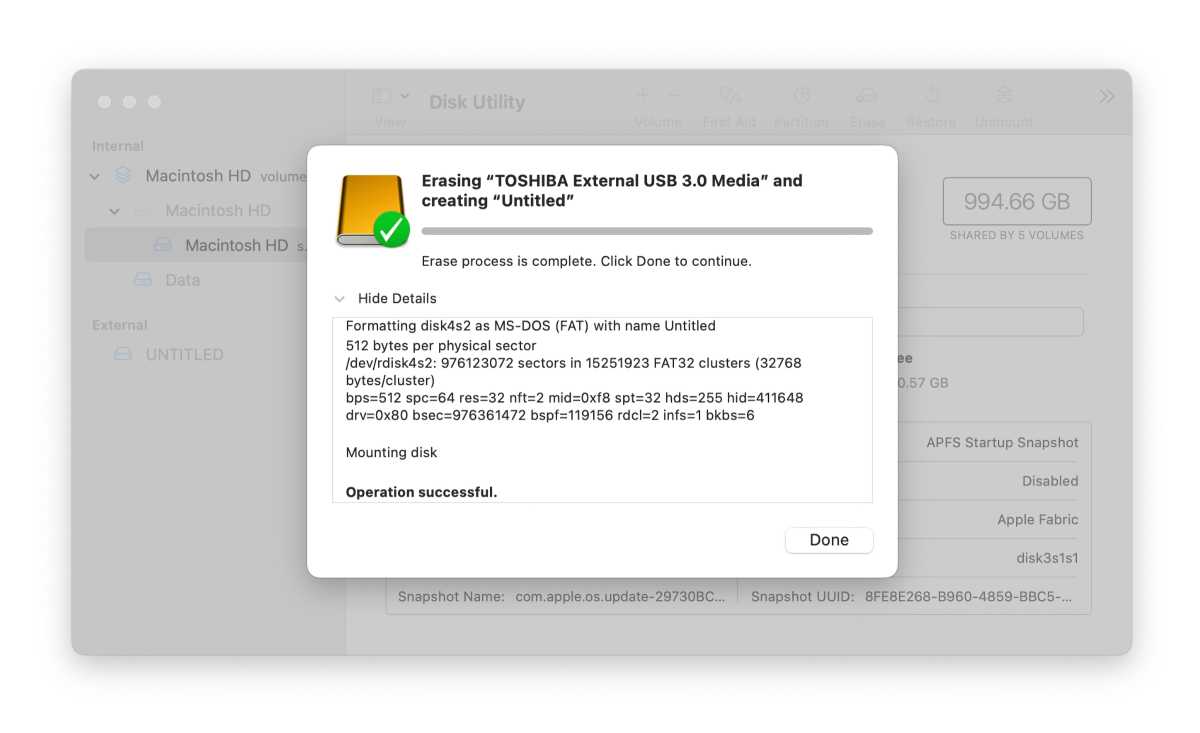
Click on Erase when you’re able to format. You’ll not see a affirmation window, so solely click on Erase when you’re certain you’re able to go. A standing window will seem when your drive is prepared for use.
Foundry
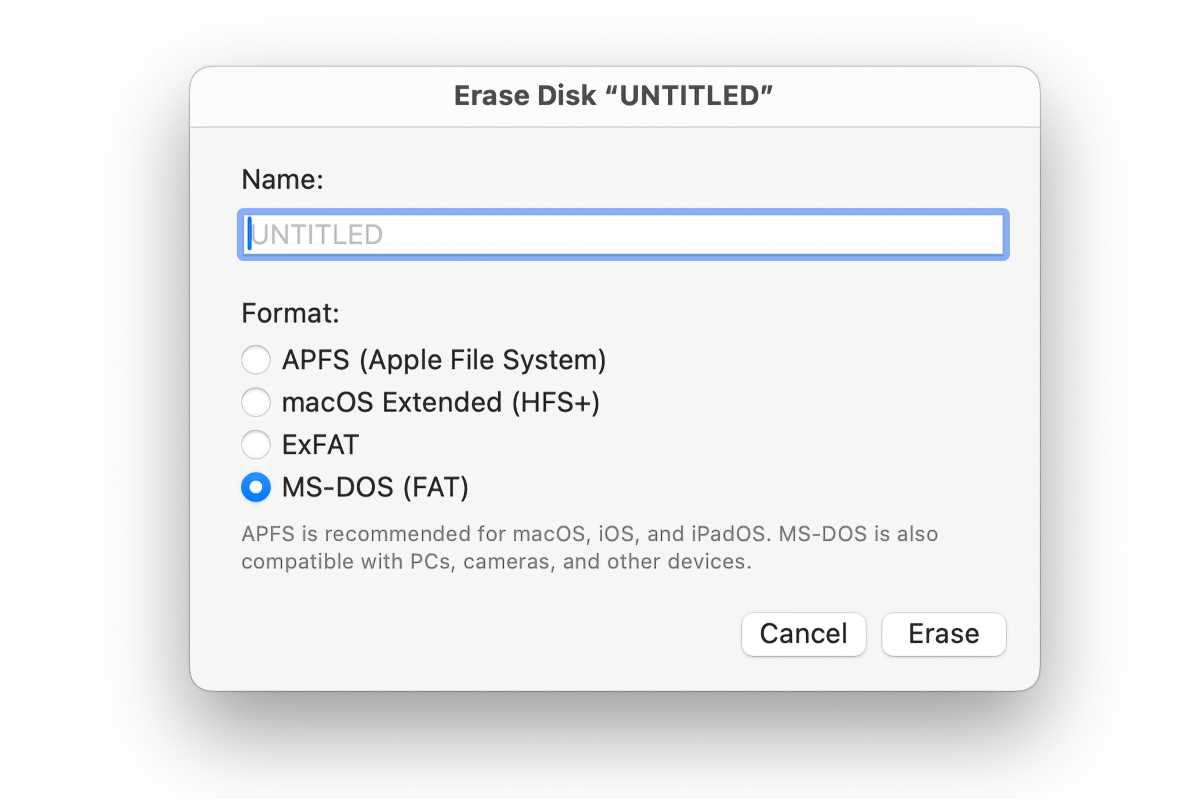
You can too format a drive should you set the Finder to indicate storage units on the Desktop. Management-click the system’s icon and choose Erase Disk, after which a window will seem asking for the title, format, and any choices you need to choose (see picture above). You don’t have to select a partition scheme when utilizing this methodology.
The way to verify a drive’s format
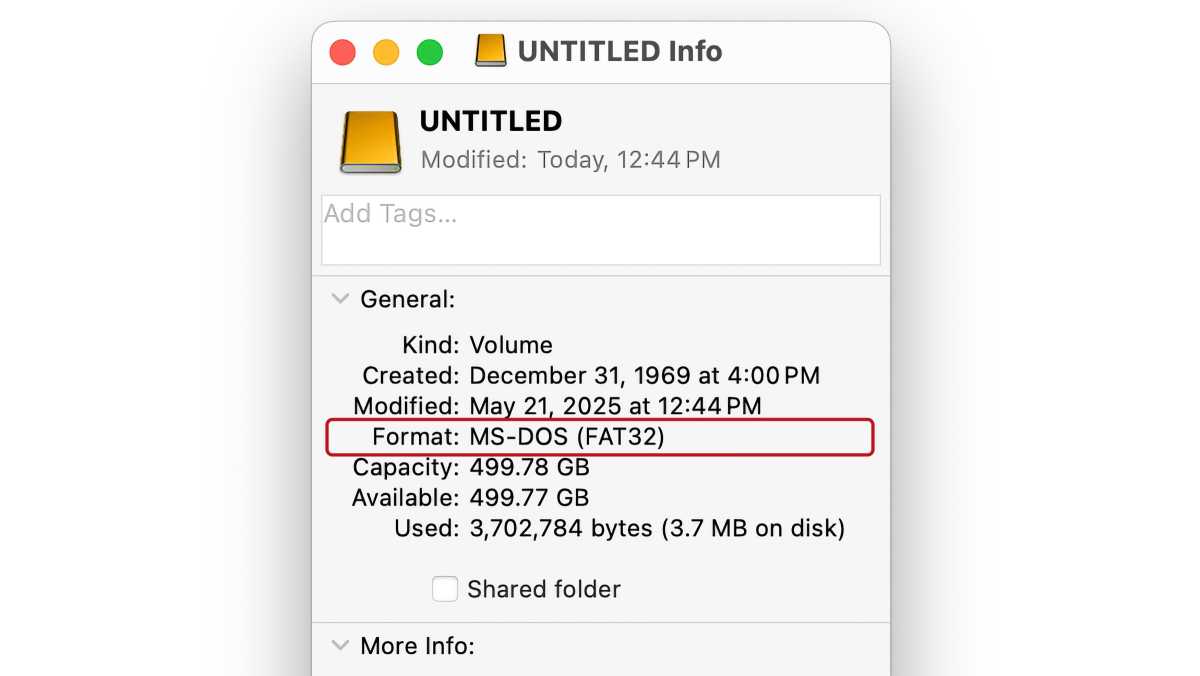
To see what format a drive is utilizing, yow will discover out within the Disk Utility app. You can too Get Information on a tool (choose it within the Finder and press Command+I) and verify the itemizing underneath “Format.”
Foundry
