
Making your 3D prints look recent off the meeting line is not as laborious as you assume. Observe these easy strategies to complete your 3D prints and make them shine.
PLA (Polylactic Acid) filament is likely one of the two mostly used desktop 3D printing supplies (with the opposite being ABS filament). It’s the ‘default’ really helpful materials for a lot of desktop 3D printers, and with good cause – PLA is helpful in a broad vary of printing purposes and might be produced in quite a lot of colours. It has the advantage of being each an odorless and low-warp materials, and doesn’t require a heated mattress. PLA plastic can be one of many extra eco-friendly 3D printer supplies accessible; it’s produced from renewable sources (corn-starch) and requires much less vitality to course of in comparison with conventional (petroleum-based) plastics. Cool, however what do you do to complete a PLA print to make it really good?
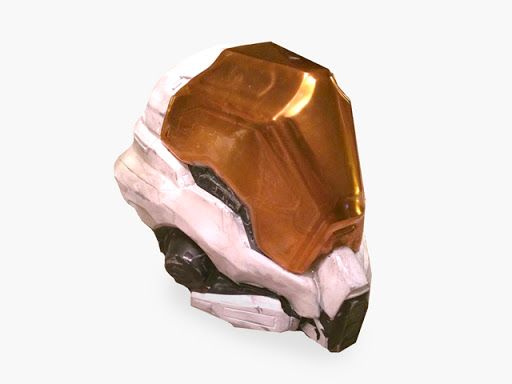
Sure, this Halo helmet is 3D printed!
There are a number of strategies to take away or diminish the striations or layer traces of a 3D print. Among the totally different processes that may be utilized to PLA might be utilized to ABS, however not vice versa. Typically, for PLA filament, the strategies you should use contain the continuous including and subtracting of various supplies backwards and forwards till it’s as clean as you need it.
What do I imply by ending?
Consider your 3D prints because the Nice Pyramids of Giza. They was completely clean down the facet, however age has revealed the layered and tough base constructed beneath. To make the pyramids clean, Historical Egyptians added limestone excessive, because it was a a lot softer materials than the bottom stone. If that they had the know-how, additionally they might have lower away the jagged ranges to make clean, flat faces. That is what ending consists of; a fantastic stability between including and subtracting materials to attain the specified floor end. The secret is to take away sufficient materials to cover some striations (layer traces) and including simply as a lot to fill within the gaps.
To assist showcase the advantages and issues that may come up with every approach, I’ve designed a “Ending Torture Check.” This easy mannequin has sharp corners on the skin of the dice and the within of the opening, alongside chamfers, and the perimeters of the pyramid. It additionally has spherical faces, fillets, and a cylinder. I selected to incorporate all these within the mannequin as they’re totally different examples of some frequent options you may discover within the numerous fashions you’ll be able to print, and to indicate how a number of the options might be misplaced or diminished.
If you would like to place your ending expertise to the take a look at, you’ll be able to obtain this mannequin from our Thingiverse or from the Design Retailer

Ending Torture Check
I began by printing out the mannequin in MatterHackers Silver PRO Sequence PLA. This can function the management print. I then repeated the print eight extra instances. The eight prints will probably be used to display 4 totally different strategies, every with two totally different finishes.

The management print.
As this in an introduction to ending PLA, this record is non-exhaustive of the strategies you’ll be able to study to scrub up your 3D prints. Extra instruments can be utilized, small ideas might be discovered, and beginning with a great mannequin are all strategies you should use to supply completed prints, however the ones I will probably be going over are:
- Portray alone
- Sanding and portray
- Sanding, filler primer, and portray
- Sanding, filler primer, spot putty, and portray
Word:
If I have been doing this with the intent to mildew these or use these as a completed product, I’d have gone via every step half a dozen instances over, shifting from low to excessive grits, priming, extra sanding, priming, sanding, spot putty, sanding once more, and so on. Because the function of this text is to indicate the distinction every materials introduces to the end of your half, just one go of sanding and ending is finished to every half.
Portray
Portray is the least concerned of any of the strategies; all you want is a rattle can and a few open air and you’ll paint your 3D print.
Supplies:
Some suggestions to observe when spray portray:
- Do not spray proper up towards your print: in the event you spray too near your print, you danger getting noticeable drips within the paint job.
- Spray in a backwards and forwards movement, overlapping every go.
- A number of coats will fill within the striations higher than one coat alone, however maintain every coat gentle.
Complete Time: 1 minute (not together with drying instances)
Right here you’ll be able to see that there are nonetheless a variety of striations seen even after the paint, however it’s lower than if it was unpainted.

Left: Management, Proper: Spray Paint
Sanding and Portray
Sanding goes to be the commonest ending approach, with any 3D printing filament. It’s simple, and it’s low cost, however that doesn’t make it any much less tedious. The decrease the grit, the coarser the sandpaper is, and the faster it’ll take away materials. I take advantage of 3M Professional Grade Precision as a result of its backing is slightly sturdier so it does not rip as simply and it lasts some time longer as a result of the grit does not gum up as rapidly as regular sandpaper.
Supplies:
- Sandpaper
- 120 grit
- 200 grit
- 400 grit
- Water
- Paper towels
- Spray Paint
Begin with the 120 grit and concentrate on the perimeters of the print. 120 grit will tear away materials fairly rapidly, so keep away from sanding corners, edges, and any fantastic particulars.

Sanded utilizing 120 grit
Proceed to progress via the grits as you want to take away much less and fewer of your print. When you’ve completed with 200, begin utilizing water as you sand. 400 grit and above goes to take away little or no materials, any main blemishes or layer traces within the mannequin will probably be principally unaffected at this level, and can roughly be sprucing what you’ve gotten.
Dip your piece of 400 grit sandpaper into some water and proceed sanding your print. The water helps maintain the paper from clogging and will get a a lot finer end than dry sanding with the identical grit. As you sand, run your fingers over the print to get a really feel for a way clean it’s. If you assume it’s fairly clean, you are prepared for paint.
Here’s what the 3D print seems like after two matte grey coats of paint or two gloss grey coats. Have in mind these are low cost Rustoleum rattle cans, however these prints do look higher after having been sanded and painted.
8 minutes utilizing 120 grit
6 minutes utilizing 220 grit
5 minutes utilizing 400 grit
1 minute spray portray
Complete time: 20 minutes (not together with drying time).

Left: sanded, matte paint; Proper: sanded, gloss paint
Filler Primer
When you’ve given it a fast sanding, spray on some filler primer to coat all the 3D print. Hold alternating via sanding with 120 and spraying filler primer till issues just like the dome on prime are stuffed in sufficient to make one clean floor, moderately than the clear layer traces on prime. As soon as it’s stuffed in sufficient, repeat the steps listed in Sanding and Portray.
Supplies:
- Filler Primer
- 120 grit
- 200 grit
- 400 grit
- Water
- Paper towels
- Spray Paint
Begin by sanding with 120 grit sandpaper to convey down a number of the floor texture. Earlier than including extra materials on prime, it’s all the time higher to take away some materials first.
8 minutes utilizing 120 grit
1 minute spraying the filler primer
7 minutes utilizing 120 grit
10 minutes utilizing 220 and 440 grit
Complete time: 26 minutes (not together with drying time).

Left: sanded, filler primer, sanded, matte paint; Proper: sanded, filler primer, sanded, gloss paint.
Spot Putty
Spot putty is a superb materials and like every nice materials, barely poisonous. Gloves are a should as spot putty is mainly dye, resin, and talcum powder, and a masks is predicated on private desire however all the time inspired. The label does record the vapor as dangerous, however it’s in such small portions I often ignore it, though it has given me complications on a number of events.
Supplies:
- Filler Primer
- Bondo Glazing and Spot Putty
- 120 grit
- 200 grit
- 400 grit
- Water
- Paper towels
- Spray Paint
- Gloves
- PPE
That is mainly the identical because the final course of, besides you can be utilizing the spot putty to fill in any low spots to fill in a number of the main layer traces, or rebuild minor blemishes like the highest of spherical floor.
First, you are going to need to observe the steps I’ve given for filler primer, as much as the purpose of switching to 220 grit. As a substitute of fixing grits, you are going to do the next steps as an alternative.
To use spot putty, both use your gloved finger, a small paddle, scrapers, the facet of a plastic scrap, a popsicle stick, it does not actually matter. My private desire is to make use of my finger for many and a small spreader for the tight areas. Utilizing a pea sized quantity of putty, I smear it throughout the surfaces of the print and attempt to unfold it thick sufficient to fill gaps however skinny sufficient to not lose the small print I am attempting to protect. Both approach, it is very easy to sand off so don’t be concerned about overdoing it.
As soon as you have coated all the 3D print with spot putty, wait quarter-hour or so till it has cured. After it has cured and is not gummy, begin sanding once more at 120 very briefly. Like I stated, it is principally talcum powder so it may be very easy to sand, you are mainly wiping it off. When your 3D print seems such as you initially did solely a light-weight coating, with pink spots of putty throughout, you are able to bump it as much as 220 grit. At that time, observe the beforehand listed instructions for sanding.
8 minutes with 120 grit
1 minute spraying filler primer
5 minutes making use of spot putty
3 minutes with 120 grit
10 minutes with 220 and 400 grit
1 minute spray portray
Complete time: 29 minutes (not together with drying time).

Left: sanded, filler primer, sanded, spot putty, sanded, matte paint; Proper: sanded, filler primer, sanded, spot putty, sanded, gloss paint.
Comparisons and Ultimate Ideas

From left to proper: Management, Painted Matte, Painted Gloss, Sanded with Matte, Sanded with Gloss, Filler with Matte, Filler with Gloss, Spot Putty with Matte, Spot Putty with Gloss
Every approach took extra time than the final, however you additionally get a lot better outcomes – in spite of everything, it’s a craft. Understand that just one coat of filler primer and spot putty was used in the course of the course of (for the sake of time), however you should use as many coats as you’d wish to get rid of layering. As you’ll be able to see within the image above, the outcomes are nonetheless fairly stellar for less than half an hour of labor. For reference, the image beneath is the 3D printed Torture Check earlier than they have been spray painted.

From left to proper: management, sanded, sanded with filler primer, sanded with spot putty.
For half two on this sequence, learn the sequel article, How To: Easy and End Your PLA Prints – Half 2
