
Liquid Glass is iOS 26’s new design language. Which means plenty of apps will likely be adopting a brand new UI philosophy that may require some important adjustments to the way you’re designing your app’s UI.
Should you’re not able to undertake Liquid Glass simply but, Apple has offered you an escape hatch that needs to be usable till the following main iOS launch.
I just lately explored updating my exercise app Maxine to work properly with Liquid Glass tab bars which you’ll study extra about right here.
On this publish, I’d prefer to discover how we will construct customized Liquid Glass parts for our apps working on iOS 26 and its siblings. We’ll begin off by exploring when Liquid Glass is suitable after which transfer on to take a look at SwiftUI’s Liquid Glass associated view modifiers.
By the tip of this publish, we’ll have constructed the UI that you could see in motion beneath (video slowed down for dramatic impact):
When do you have to use Liquid Glass
The thought of Liquid Glass is that it acts as a layer on prime of your app’s UI. In apply this can normally imply that your major app content material isn’t constructed utilizing the glass fashion. Doing so would lead to some fairly dangerous wanting UI as you may see on this video:
On this video, I utilized a glass impact to all of my record rows. The result’s an excellent bizarre interface that overuses Liquid Glass.
As an alternative, Liquid Glass needs to be utilized to components that sit on prime of your UI. Examples embrace toolbars, tab bars, floating motion buttons and related parts.
An instance of this may be seen proper right here in Maxine:
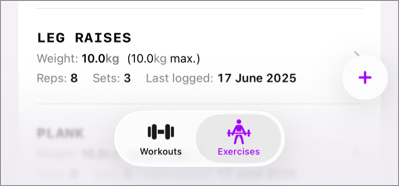
The default tab bar is a Liquid Glass element that overlays my record. The floating plus button additionally has a glass impact utilized to it despite the fact that you may barely see it because of the mild background.
The purpose is that Liquid Glass components ought to all the time be designed as sitting “on prime” of one thing. They don’t stack, they’re not a part of your major UI, they’re all the time on their very own layer whenever you’re designing.
Now, I’m not a designer. So in case you can provide you with an effective way to make use of Liquid Glass that locations a component in your major content material. I’m not going to inform you that you could’t or shouldn’t; you in all probability know a lot better than I do. That stated, Apple’s philosophy for Liquid Glass is a layered design so for security you must in all probability persist with that.
Making use of a Liquid Glass impact to UI components
Let’s construct out a pleasant UI ingredient that may actually profit from a Liquid Glass feel and appear. It’s a UI ingredient that existed in an app known as Path which not exists, and the UI ingredient hasn’t actually been used a lot since. That stated, I just like the interplay and I feel it’ll be enjoyable to provide it a glass overhaul.
Our Start line
You possibly can see an instance of the button and its UI proper right here:
It takes fairly some code to realize this impact, and most of it isn’t related to Liquid Glass. That’s why you may check out the ultimate code proper right here on GitHub. There’s a department for the place to begin in addition to the tip end result (major) so you may mess around a bit in case you’d like.
The view itself seems to be like this:
struct ContentView: View {
    @State personal var isExpanded = false
    var physique: some View {
        ZStack(alignment: .bottomTrailing) {
            Colour
                .clear
                .overlay(
                    Picture("bg_img")
                        .resizable()
                        .scaledToFill()
                        .edgesIgnoringSafeArea(.all)
                )

            button(sort: .house)
            button(sort: .write)
            button(sort: .chat)
            button(sort: .e mail)

            Button {
                withAnimation {
                    isExpanded.toggle()
                }
            } label: {
                Label("Residence", systemImage: "record.bullet")
                    .labelStyle(.iconOnly)
                    .body(width: 50, peak: 50)
                    .background(Circle().fill(.purple))
                    .foregroundColor(.white)
            }.padding(32)
        }
    }

    personal func button(sort: ButtonType) -> some View {
        return Button {} label: {
            Label(sort.label, systemImage: sort.systemImage)
                .labelStyle(.iconOnly)
                .body(width: 50, peak:50)
                .background(Circle().fill(.white))
        }
        .padding(32)
        .offset(isExpanded ? sort.offset : .zero)
        .animation(.spring(period: sort.period, bounce: 0.2))
    }
}
This view by itself isn’t all that fascinating, it accommodates a few buttons, and making use of a liquid glass impact to our buttons shouldn’t be too exhausting.
Making use of a glass impact
To make buttons seem like Liquid Glass, you apply the glassEffect view modifier to them:
Button {
    withAnimation {
        isExpanded.toggle()
    }
} label: {
    Label("Residence", systemImage: "record.bullet")
        .labelStyle(.iconOnly)
        .body(width: 50, peak: 50)
        .background(Circle().fill(.purple))
        .foregroundColor(.white)
}
.glassEffect()
.padding(32)
After making use of the liquidGlass modifier to all buttons the app seems to be like this whenever you run it:
We’re not seeing a glass impact in any respect!
That’s as a result of we additionally set a background on our buttons, so let’s go forward and take away the background to see what our view seems to be like:
Button {
    withAnimation {
        isExpanded.toggle()
    }
} label: {
    Label("Residence", systemImage: "record.bullet")
        .labelStyle(.iconOnly)
        .body(width: 50, peak: 50)
        .foregroundColor(.white)
}
.glassEffect()
.padding(32)
If we run the app now, our UI seems to be like this:
Our icons are a bit exhausting to learn and I’m actually not precisely positive whether or not it is a beta bug or whether or not it’s purported to be this fashion.
Be aware that Button additionally comes with a .glass button fashion that you should utilize. This impact is barely totally different from what I’ve used right here however I discover that the button fashion doesn’t all the time permit for the sorts of customizations that I like.
You possibly can apply the glass button fashion as follows:
Button {
    withAnimation {
        isExpanded.toggle()
    }
} label: {
    Label("Residence", systemImage: "record.bullet")
        .labelStyle(.iconOnly)
        .body(width: 50, peak: 50)
        .foregroundColor(.white)
}
.buttonStyle(.glass)
.padding(32)
That stated, there are two issues I’d love to do at this level:
- Apply a background tint to the buttons
- Make the buttons seem interactive
Let’s begin with the background colour.
Making use of a background colour to our glass impact
To fashion our buttons with a background colour, we have to tint our glass. Right here’s how we will do this:
Button {
withAnimation {
isExpanded.toggle()
}
} label: {
Label("Residence", systemImage: "record.bullet")
.labelStyle(.iconOnly)
.body(width: 50, peak: 50)
.foregroundColor(.white)
}
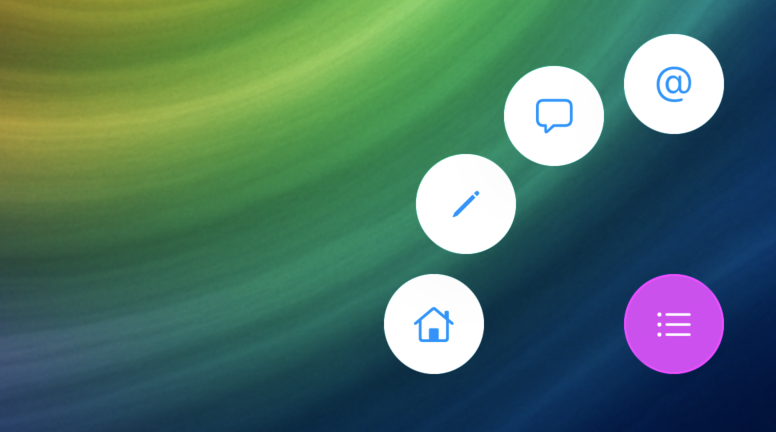
.glassEffect(.common.tint(.purple))
.padding(32)This already seems to be quite a bit higher:
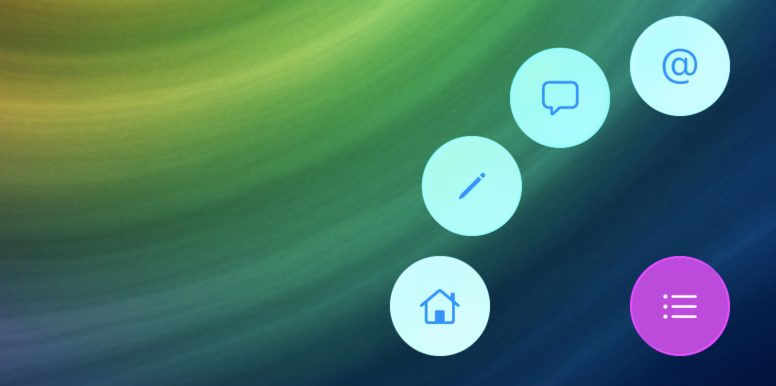
Discover that the buttons nonetheless have a round form despite the fact that we’re not explicitly drawing a circle background. That’s the default fashion for parts that you simply apply a glassEffect to. You’ll all the time get a form that has rounded corners that match properly with the remainder of your app’s UI and the context the place the impact is utilized.
I do really feel like my buttons are a bit too opaque, so let’s apply a little bit of opacity to our tint colour to get extra of a see-through impact:
Button {
withAnimation {
isExpanded.toggle()
}
} label: {
Label("Residence", systemImage: "record.bullet")
.labelStyle(.iconOnly)
.body(width: 50, peak: 50)
.foregroundColor(.white)
}
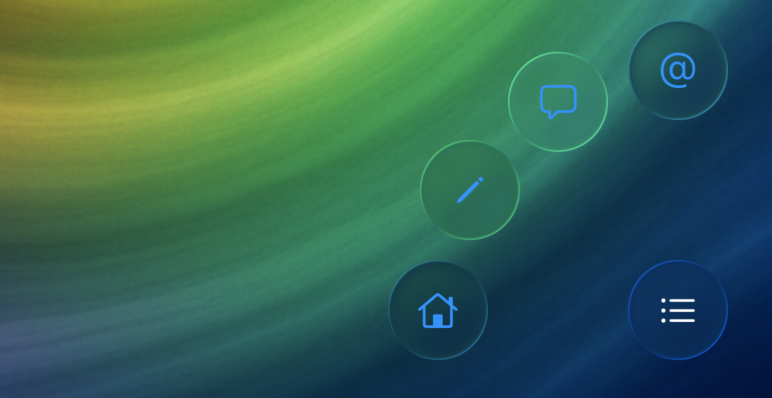
.glassEffect(.common.tint(.purple.opacity(0.8))
.padding(32)That is what our view seems to be like now:
After I faucet the buttons now, not quite a bit occurs as proven within the video above. We will do higher by making our buttons reply to consumer interplay.
Making an interactive glass impact
To make our glass buttons reply to consumer enter by rising a bit and making use of a kind of shimmer impact, we apply the interactive modifier to the glass impact:
Button {
    withAnimation {
        isExpanded.toggle()
    }
} label: {
    Label("Residence", systemImage: "record.bullet")
        .labelStyle(.iconOnly)
        .body(width: 50, peak: 50)
        .foregroundColor(.white)
}
.glassEffect(.common.tint(.purple.opacity(0.8).interactive())
.padding(32)
That is what our interactions seem like now:
Our UI is coming collectively. With the glassEffect view modifier, the interactive modifier and a tint we managed to construct a reasonably compelling impact.
Nonetheless, our UI isn’t fairly liquid. You’re distinct buttons performing an impact.
We will group our components collectively to make it seem as if they’re all coming from the identical drop of glass.
This sounds a bit bizarre so let’s simply bounce into an instance instantly.
Grouping Liquid Glass components collectively
The very first thing we should always do now that we have now a bunch of components which are all utilizing a Liquid Glass impact is group them collectively in a container. This can be a advice from Apple that helps be certain the system can render our results effectively:
GlassEffectContainer {
    button(sort: .house)
    button(sort: .write)
    button(sort: .chat)
    button(sort: .e mail)

    Button {
        withAnimation {
            isExpanded.toggle()
        }
    } label: {
        Label("Residence", systemImage: "record.bullet")
            .labelStyle(.iconOnly)
            .body(width: 50, peak: 50)
            .foregroundColor(.white)
    }
    .glassEffect(.common.tint(.purple.opacity(0.8)).interactive())
    .padding(32)
}
We will make a number of Liquid Glass parts act as a single “unit” by grouping them collectively. To do that, we have to outline a namespace that our UI components can share:
struct ContentView: View {
  @Namespace var glassNamespace

  var physique: some View { /* ... */ }
}
Subsequent, we will group our components collectively within that namespace utilizing the glassEffectID view modifier. This modifier requires a namespace and a novel identifier for every button in our element. The purple button would look as follows:
Button {
    withAnimation {
        isExpanded.toggle()
    }
} label: {
    Label("Residence", systemImage: "record.bullet")
        .labelStyle(.iconOnly)
        .body(width: 50, peak: 50)
        .foregroundColor(.white)
}
.glassEffect(.common.tint(.purple.opacity(0.8)).interactive())
.glassEffectID("menu", in: glassNamespace)
We add glassEffectID to each ingredient that has a glass impact utilized.
By doing this, the weather will mix collectively after they’re shut to one another within the UI. For instance, after we place all buttons in an HStack with no spacing, they find yourself wanting like this:
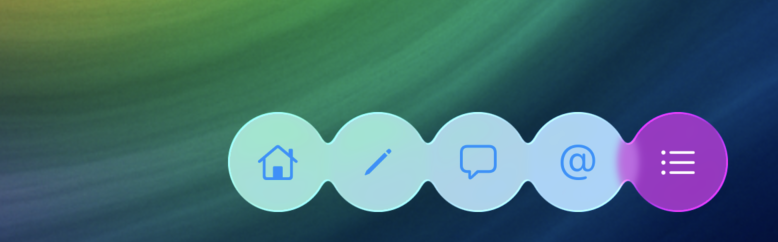
As a result of all the weather are in the identical GlassEffectContainer they usually share a glassEffectID namespace, we will now run our animation and have the buttons animate in a fluid method:
I’ve slowed the whole lot down a bit so you may benefit from the impact and see that the parts all originate from a single button, making them seem like a liquid.
The maths to realize all that is a part of the ButtonType enum within the GitHub repository that you could try if you wish to see precisely how the tip end result was achieved.
In Abstract
Liquid glass may not be your factor and that’s completely advantageous. That stated, it permits us to experiment with UI in enjoyable ways in which may shock you.
On this publish, you discovered concerning the glassEffect modifier in addition to the glassEffectID view modifier to construct a enjoyable menu element that may present and conceal itself utilizing a enjoyable, fluid animation.
If you wish to see the tip end result or use this code, be happy to drag it from GitHub and modify it to fit your wants.
