
Think about sending your individual customized memes or cartoons as an alternative of those from the web. So, remodel your selfies or images into enjoyable, stylized stickers utilizing OpenAI’s new GPT-Picture-1 mannequin. On this tutorial, we’ll construct a WhatsApp sticker generator in Python that applies varied artwork types, together with caricature and Pixar-style filters, to your photos.
You’ll discover ways to arrange the OpenAI picture enhancing API, seize or add photos in Colab, outline humorous and humorous textual content classes, or use your individual textual content and course of three stickers in parallel utilizing a number of API keys for pace. By the tip, you’ll have a working sticker maker powered by GPT-Picture-1 and customized textual content prompts.
Why GPT-Picture-1?
We evaluated a number of cutting-edge image-generation fashions, together with Gemini 2.0 Flash, Flux, and Phoenix, on the Leonardo.ai platform. Specifically, all these fashions struggled with rendering textual content and expressions accurately. As an example:
- Google’s Gemini 2.0 picture API typically produces misspelled or jumbled phrases even when given precise directions. For Instance, with Gemini, the precise textual content appears to be like like ‘Large Sale At the moment!’ and we get outputs like “Large Sale Todai” or random gibberish.
- Flux delivers excessive picture high quality on the whole, however customers report that it “shortly launched little errors” into any textual content it renders. Flux additionally makes tiny spelling errors or garbled letters, particularly because the textual content size will increase. Flux additionally defaults to very related face generations, i.e, “all faces are trying the identical” except closely constrained.
- Phoenix is optimized for constancy and immediate adherence, however like most diffusion fashions, it nonetheless views textual content visually and may introduce errors. We discovered that Phoenix may generate a sticker with the right wording solely sporadically, and it tended to repeat the identical default face for a given immediate.
Collectively, these limitations led us to develop GPT-Picture-1. In contrast to the above fashions, GPT-Picture-1 incorporates a specialised immediate pipeline that explicitly enforces right textual content and expression adjustments.
Learn extra: The way to run the Flux mannequin?
How GPT-Picture-1 Powers Picture Enhancing
GPT-Picture-1 is OpenAI’s flagship multimodal mannequin. It creates and edits photos from textual content and picture prompts to generate high-quality picture outputs. Primarily, we are able to instruct GPT-Picture-1 to use an edit to a supply picture based mostly on a textual content immediate. In our case, we use the pictures. Edit the API endpoint with GPT-Picture-1 to use enjoyable and humorous filtering, and overlay textual content to a photograph enter to create stickers.
The immediate is rigorously constructed to implement a sticker-friendly output (1024×1024 PNG). Then GPT-Picture-1 basically turns into the AI-powered sticker creator, the place it’ll change the looks of the topic within the photograph and add hilarious textual content.
# Arrange OpenAI shoppers for every API key (to run parallel requests)

shoppers = [OpenAI(api_key=key) for key in API_KEYS]
So, for that, we create one OpenAI shopper per API key. With three keys, we are able to make three simultaneous API calls. This multi-key, multi-thread method makes use of ThreadPoolExecutor. It lets us generate 3 stickers in parallel for every run. Because the code prints, it makes use of “3 API keys for SIMULTANEOUS era”, dramatically rushing up the sticker creation..
Step-by-Step Information
The thought of making your individual AI sticker generator might sound complicated, however this information will show you how to simplify your complete course of. You’ll start with the setting preparation in Google Colab, then we are going to overview the API, perceive classes of phrases, validate textual content, generate totally different inventive types, and at last generate stickers in parallel. Every half is accompanied by code snippets and explanations so you possibly can observe alongside simply. Now, let’s proceed to code:
Putting in and Working on Colab
To generate stickers, we’ve obtained to have the proper setup! This venture will use Python libraries PIL and rembg for fundamental picture processing, and google-genai might be used to be used within the Colab occasion. Step one is the set up the dependencies straight in your Colab pocket book.
!pip set up --upgrade google-genai pillow rembg

!pip set up --upgrade onnxruntime

!pip set up python-dotenv
OpenAI Integration and API Keys
After set up, import the modules and arrange API keys. The script creates one OpenAI shopper per API key. This lets the code distribute image-edit requests throughout a number of keys in parallel. The shopper record is then utilized by the sticker-generation features.
API_KEYS = [ # 3 API keys

            "API KEY 1",

             "API KEY 2",

             "API KEY 3"

]

"""# Stickerverse

"""

import os

import random

import base64

import threading

from concurrent.futures import ThreadPoolExecutor, as_completed

from openai import OpenAI

from PIL import Picture

from io import BytesIO

from rembg import take away

from google.colab import information

from IPython.show import show, Javascript

from google.colab.output import eval_js

import time

shoppers = [OpenAI(api_key=key) for key in API_KEYS]
Picture add & digicam seize (logic)
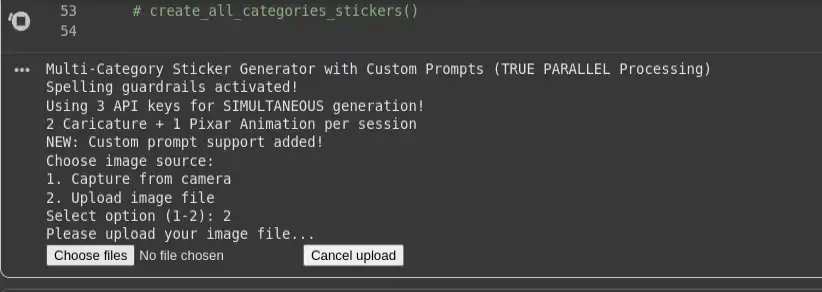
Now the following step is to entry the digicam to seize a photograph or add a picture file. The capture_photo() makes use of JavaScript injected into Colab to open the webcam and return a captured picture.upload_image() makes use of Colab’s file add widget and verifies the uploaded file with PIL.
# Digicam seize by way of JS

def capture_photo(filename="photograph.jpg", high quality=0.9):

    js_code = """

    async perform takePhoto(high quality) {

        const div = doc.createElement('div');

        const video = doc.createElement('video');

        const btn = doc.createElement('button');

        btn.textContent="📸 Seize";

        div.appendChild(video);

        div.appendChild(btn);

        doc.physique.appendChild(div);

        const stream = await navigator.mediaDevices.getUserMedia({video: true});

        video.srcObject = stream;

        await video.play();

        await new Promise(resolve => btn.onclick = resolve);

        const canvas = doc.createElement('canvas');

        canvas.width = video.videoWidth;

        canvas.top = video.videoHeight;

        canvas.getContext('2nd').drawImage(video, 0, 0);

        stream.getTracks().forEach(observe => observe.cease());

        div.take away();

        return canvas.toDataURL('picture/jpeg', high quality);

    }

    """

    show(Javascript(js_code))

    knowledge = eval_js("takePhoto(%f)" % high quality)

    binary = base64.b64decode(knowledge.cut up(',')[1])

    with open(filename, 'wb') as f:

        f.write(binary)

    print(f"Saved: {filename}")

    return filename

# Picture add perform

def upload_image():

    print("Please add your picture file...")

    uploaded = information.add()

    if not uploaded:

        print("No file uploaded!")

        return None

    filename = record(uploaded.keys())[0]

    print(f"Uploaded: {filename}")

    # Validate if it is a picture

    strive:

        img = Picture.open(filename)

        img.confirm()

        print(f"📸 Picture verified: {img.format} {img.measurement}")

        return filename

    besides Exception as e:

        print(f"Invalid picture file: {str(e)}")

        return None

# Interactive picture supply choice

def select_image_source():

    print("Select picture supply:")

    print("1. Seize from digicam")

    print("2. Add picture file")

    whereas True:

        strive:

            alternative = enter("Choose choice (1-2): ").strip()

            if alternative == "1":

                return "digicam"

            elif alternative == "2":

                return "add"

            else:

                print("Invalid alternative! Please enter 1 or 2.")

        besides KeyboardInterrupt:

            print("nGoodbye!")

            return None
Output:
Examples of Classes and Phrases
Now we’ll create our totally different phrase classes to placed on our stickers. Subsequently, we’ll use a PHRASE_CATEGORIES dictionary that comprises many classes, equivalent to company, Bollywood, Hollywood, Tollywood, sports activities, memes, and others. When a class is chosen, the code randomly selects three distinctive phrases for the three sticker types.
PHRASE_CATEGORIES = {

    "company": [

        "Another meeting? May the force be with you!",

        "Monday blues activated!",

        "This could have been an email, boss!"

    ],

    "bollywood": [

        "Mogambo khush hua!",

        "Kitne aadmi the?",

        "Picture abhi baaki hai mere dost!"

    ],

    "memes": [

        "Bhagwan bharose!",

        "Main thak gaya hoon!",

        "Beta tumse na ho payega!"

    ]

}
Phrase Classes and Customized Textual content
The generator makes use of a dictionary of phrase classes. The consumer can both choose a class for random phrase choice or enter their very own customized phrase. There are additionally helper features for interactive choice, in addition to a easy perform to validate the size of a customized phrase.
def select_category_or_custom():

    print("nChoose your sticker textual content choice:")

    print("1. Choose from phrase class (random choice)")

    print("2. Enter my very own customized phrase")

    whereas True:

        strive:

            alternative = enter("Select choice (1 or 2): ").strip()

            if alternative == "1":

                return "class"

            elif alternative == "2":

                return "customized"

            else:

                print("Invalid alternative! Please enter 1 or 2.")

        besides KeyboardInterrupt:

            print("nGoodbye!")

            return None

# NEW: Perform to get customized phrase from consumer

def get_custom_phrase():

    whereas True:

        phrase = enter("nEnter your customized sticker textual content (2-50 characters): ").strip()

        if len(phrase)  50:

            print("Too lengthy! Please maintain it beneath 50 characters.")

            proceed

        else:

            print(f"Customized phrase accepted: '{phrase}'")

            return phrase
For customized phrases, enter size is checked (2–50 characters) earlier than acceptance.
Phrase Validation and Spelling Guardrails
def validate_and_correct_spelling(textual content):

    spelling_prompt = f"""

    Please test the spelling and grammar of the next textual content and return ONLY the corrected model.

    Don't add explanations, feedback, or change the that means.

    Textual content to test: "{textual content}"

    """

    response = shoppers[0].chat.completions.create(

        mannequin="gpt-4o-mini",

        messages=[{"role": "user", "content": spelling_prompt}],

        max_tokens=100,

        temperature=0.1

    )

    corrected_text = response.selections[0].message.content material.strip()

    return corrected_text
Now we’ll create a pattern build_prompt perform to arrange some basic-level directions for the agent. Additionally be aware build_prompt() calls the spelling validator, after which embeds the corrected textual content into the strict sticker immediate:
# Concise Immediate Builder with Spelling Validation

def build_prompt(textual content, style_variant):

    corrected_text = validate_and_correct_spelling(textual content)

    base_prompt = f"""

    Create a HIGH-QUALITY WhatsApp sticker in {style_variant} model.

    OUTPUT:

    - 1024x1024 clear PNG with 8px white border

    - Topic centered, balanced composition, sharp particulars

    - Protect unique facial identification and proportions

    - Match expression to sentiment of textual content: '{corrected_text}'

    TEXT:

    - Use EXACT textual content: '{corrected_text}' (no adjustments, no emojis)

    - Daring comedian font with black define, high-contrast colours

    - Place textual content in empty house (high/backside), by no means masking the face

    RULES:

    - No hallucinated parts or ornamental glyphs

    - No cropping of head/face or textual content

    - Keep lifelike however expressive look

    - Guarantee consistency throughout stickers

    """

    return base_prompt.strip()
Type Variants: Caricature vs Pixar
The three model templates stay in STYLE_VARIANTS. The primary two are caricature transformations and the final is a Pixar-esque 3D look. These strings will get despatched straight into the immediate builder and dictate the visible model.
STYLE_VARIANTS = ["Transform into detailed caricature with slightly exaggerated facial features...",
"Transform into expressive caricature with enhanced personality features...",
"Transform into high-quality Pixar-style 3D animated character..."
]
Producing Stickers in Parallel
The true power of the venture is the parallel sticker era. The sticker era is completed in parallel with threading all three on the similar time, utilizing separate API keys, so wait instances are dramatically lowered.
# Generate single sticker utilizing OpenAI GPT-image-1 with particular shopper (WITH TIMING)
def generate_single_sticker(input_path, output_path, textual content, style_variant, client_idx):

    strive:

        start_time = time.time()

        thread_id = threading.current_thread().identify

        print(f"[START] Thread-{thread_id}: API-{client_idx+1} producing {style_variant[:30]}... at {time.strftime('%H:%M:%S', time.localtime(start_time))}")

        immediate = build_prompt(textual content, style_variant)

        consequence = shoppers[client_idx].photos.edit(

            mannequin="gpt-image-1",

            picture=[open(input_path, "rb")],

            immediate=immediate,

            # input_fidelity="excessive"

            high quality = 'medium'

        )

        image_base64 = consequence.knowledge[0].b64_json

        image_bytes = base64.b64decode(image_base64)

        with open(output_path, "wb") as f:

            f.write(image_bytes)

        end_time = time.time()

        length = end_time - start_time

        style_type = "Caricature" if "caricature" in style_variant.decrease() else "Pixar"

        print(f"[DONE] Thread-{thread_id}: {style_type} saved as {output_path} | Length: {length:.2f}s | Textual content: '{textual content[:30]}...'")

        return True

    besides Exception as e:

        print(f"[ERROR] API-{client_idx+1} failed: {str(e)}")

        return False

# NEW: Create stickers with customized phrase (all 3 types use the identical customized textual content)

def create_custom_stickers_parallel(photo_file, custom_text):

    print(f"nCreating 3 stickers along with your customized phrase: '{custom_text}'")

    print("   • Type 1: Caricature #1")

    print("   • Type 2: Caricature #2")

    print("   • Type 3: Pixar Animation")

    # Map futures to their data

    tasks_info = {}

    with ThreadPoolExecutor(max_workers=3, thread_name_prefix="CustomSticker") as executor:

        start_time = time.time()

        print(f"n[PARALLEL START] Submitting 3 API calls SIMULTANEOUSLY at {time.strftime('%H:%M:%S', time.localtime(start_time))}")

        # Submit ALL duties directly (non-blocking) - all utilizing the identical customized textual content

        for idx, style_variant in enumerate(STYLE_VARIANTS):

            output_name = f"custom_sticker_{idx+1}.png"

            future = executor.submit(generate_single_sticker, photo_file, output_name, custom_text, style_variant, idx)

            tasks_info[future] = {

                'output_name': output_name,

                'textual content': custom_text,

                'style_variant': style_variant,

                'client_idx': idx,

                'submit_time': time.time()

            }

        print("All 3 API requests submitted! Processing as they full...")

        accomplished = 0

        completion_times = []

        # Course of outcomes as they full

        for future in as_completed(tasks_info.keys(), timeout=180):

            strive:

                success = future.consequence()

                task_info = tasks_info[future]

                if success:

                    accomplished += 1

                    completion_time = time.time()

                    completion_times.append(completion_time)

                    length = completion_time - task_info['submit_time']

                    style_type = "Caricature" if "caricature" in task_info['style_variant'].decrease() else "Pixar"

                    print(f"[{completed}/3] {style_type} accomplished: {task_info['output_name']} "

                          f"(API-{task_info['client_idx']+1}, {length:.1f}s)")

                else:

                    print(f"Failed: {task_info['output_name']}")

            besides Exception as e:

                task_info = tasks_info[future]

                print(f"Error with {task_info['output_name']} (API-{task_info['client_idx']+1}): {str(e)}")

        total_time = time.time() - start_time

        print(f"n [FINAL RESULT] {accomplished}/3 customized stickers accomplished in {total_time:.1f} seconds!")

# UPDATED: Create 3 stickers in  PARALLEL (utilizing as_completed)

def create_category_stickers_parallel(photo_file, class):

    if class not in PHRASE_CATEGORIES:

        print(f" Class '{class}' not discovered! Accessible: {record(PHRASE_CATEGORIES.keys())}")

        return

    # Select 3 distinctive phrases for 3 stickers

    chosen_phrases = random.pattern(PHRASE_CATEGORIESBeginner, 3)

    print(f" Chosen phrases for {class.title()} class:")

    for i, phrase in enumerate(chosen_phrases, 1):

        style_type = "Caricature" if i  1:

            fastest_completion = min(completion_times) - start_time

            print(f"Parallel effectivity: Quickest completion in {fastest_completion:.1f}s")
Right here, generate_single_sticker() builds the immediate and calls the pictures. edit endpoint utilizing the desired client_idx. The parallel features create a ThreadPoolExecutor with max_workers=3, submit the three duties, and course of outcomes with as_completed. This lets the script log every completed sticker shortly. Furthermore, we are able to additionally view the logs to see what is occurring for every thread (time, what was it caricature or Pixar model).
Predominant execution block
On the backside of the script, the __main__ guard defaults to working sticker_from_camera(). Nonetheless, you possibly can agree/uncomment as desired to run interactive_menu(), create_all_category_stickers() or different features.
# Predominant execution

if __name__ == "__main__":

    sticker_from_camera()
Output:
Output Picture:

For the whole model of this WhatsApp sticker generator code, go to this GitHub repository.
Conclusion
On this tutorial, we’ve got walked via establishing GPT-Picture-1 calls, establishing an prolonged immediate for stickers, capturing or importing photos, deciding on amusing phrases or customized textual content, and working 3 model variants concurrently. In just some hundred strains of code, this venture converts your photos into some comic-styled stickers.
By merely combining OpenAI’s imaginative and prescient mannequin with some artistic immediate engineering and multi-threading, you possibly can generate enjoyable, personalised stickers in seconds. And the consequence might be an AI-based WhatsApp sticker generator that may produce immediately shareable stickers with a single click on to any of your mates and teams. Now strive it to your personal photograph and your favourite joke!
Often Requested Questions
A. It transforms your uploaded or captured images into enjoyable, stylized WhatsApp stickers with textual content utilizing OpenAI’s GPT-Picture-1 mannequin.
A. GPT-Picture-1 handles textual content accuracy and facial expressions higher than fashions like Gemini, Flux, or Phoenix, making certain stickers have right wording and expressive visuals.
A. It makes use of three OpenAI API keys and a ThreadPoolExecutor to generate three stickers in parallel, reducing down processing time.
Hiya! I am Vipin, a passionate knowledge science and machine studying fanatic with a robust basis in knowledge evaluation, machine studying algorithms, and programming. I’ve hands-on expertise in constructing fashions, managing messy knowledge, and fixing real-world issues. My aim is to use data-driven insights to create sensible options that drive outcomes. I am desirous to contribute my abilities in a collaborative setting whereas persevering with to study and develop within the fields of Knowledge Science, Machine Studying, and NLP.
Login to proceed studying and revel in expert-curated content material.
