
It’s all very effectively telling folks to again up their Mac. However human nature signifies that trying to find backup recommendation is one thing that normally occurs after the worst has already occurred.
Hopefully, you’ll have the ability to repair the broken drive and get your knowledge again by following our recommendation, however we will even cowl what you might want to find out about crashing and not using a backup and the right way to recuperate knowledge from broken arduous disk or an exterior drive.
This information can be related in case you have by chance deleted a file. Deleted information may be retrieved too, however provided that they haven’t been overwritten. As soon as the a part of the disk with the information is overwritten, nothing can get it again.
How you can restore a failed Mac arduous disk with Disk Utility
If you’re very fortunate your arduous drive or SSD isn’t past restore and it is possible for you to to repair the issue your self and due to this fact get entry to your information.
Apple’s Disk Utility software (positioned in your Mac’s Functions > Utilities folder) isn’t the best restore instrument on your Mac’s arduous drives, however it could possibly head off small issues earlier than they worsen.
In case your drive is having issues and also you change into conscious of this earlier than the machine crashes, or should you handle to get it up and working once more (or within the case of an exterior drive your Mac is ready to detect it), the very first thing to do is launch Disk Utility, choose the drive and run First Help to examine the amount for errors. Right here’s what to do:
- Open Disk Utility – You’ll discover this within the Utilities folder, inside your Apps folder or by trying to find it utilizing Highlight Search. (Press Command+House to set off this).
- Click on on the disk you’re involved about from the checklist on the left, after which click on First Help.
- You will note a message indicating that First Help will examine the amount for errors. It’ll then restore the amount if needed.

- Upon initiating this course of you will notice a warning that First Help must quickly lock the boot quantity. Because of this whereas First Help is working apps received’t be responsive. The method most likely received’t take lengthy.

- If throughout the course of Disk Utility detects any points and it’s simply fastened, then it ought to be resolved rapidly.
- If you’ll be able to repair the arduous drive or SSD in your Mac (or a exterior drive) utilizing Disk Utility you’ll hopefully have the ability to recuperate your information. We recommend you again up your Mac at this level earlier than working the danger of the disk failing once more.
Over the previous a number of years, Apple has up to date Disk Utility and altered what the appliance is able to. You possibly can simply create disk partitions if desired, and you too can get in depth details about a selected quantity by clicking its icon after which clicking the “Data” button.
Additionally, as of macOS 10.12 (Sierra), Apple has eliminated the flexibility for the native copy of Disk Utility to restore permissions, which was each helpful in correcting odd software program conduct however might additionally result in unusual behaviors out of your purposes. You possibly can nonetheless restore your Mac’s file permissions, however you’ll should again up from Restoration Mode. We’ve got a full information to utilizing Disk Utility right here.
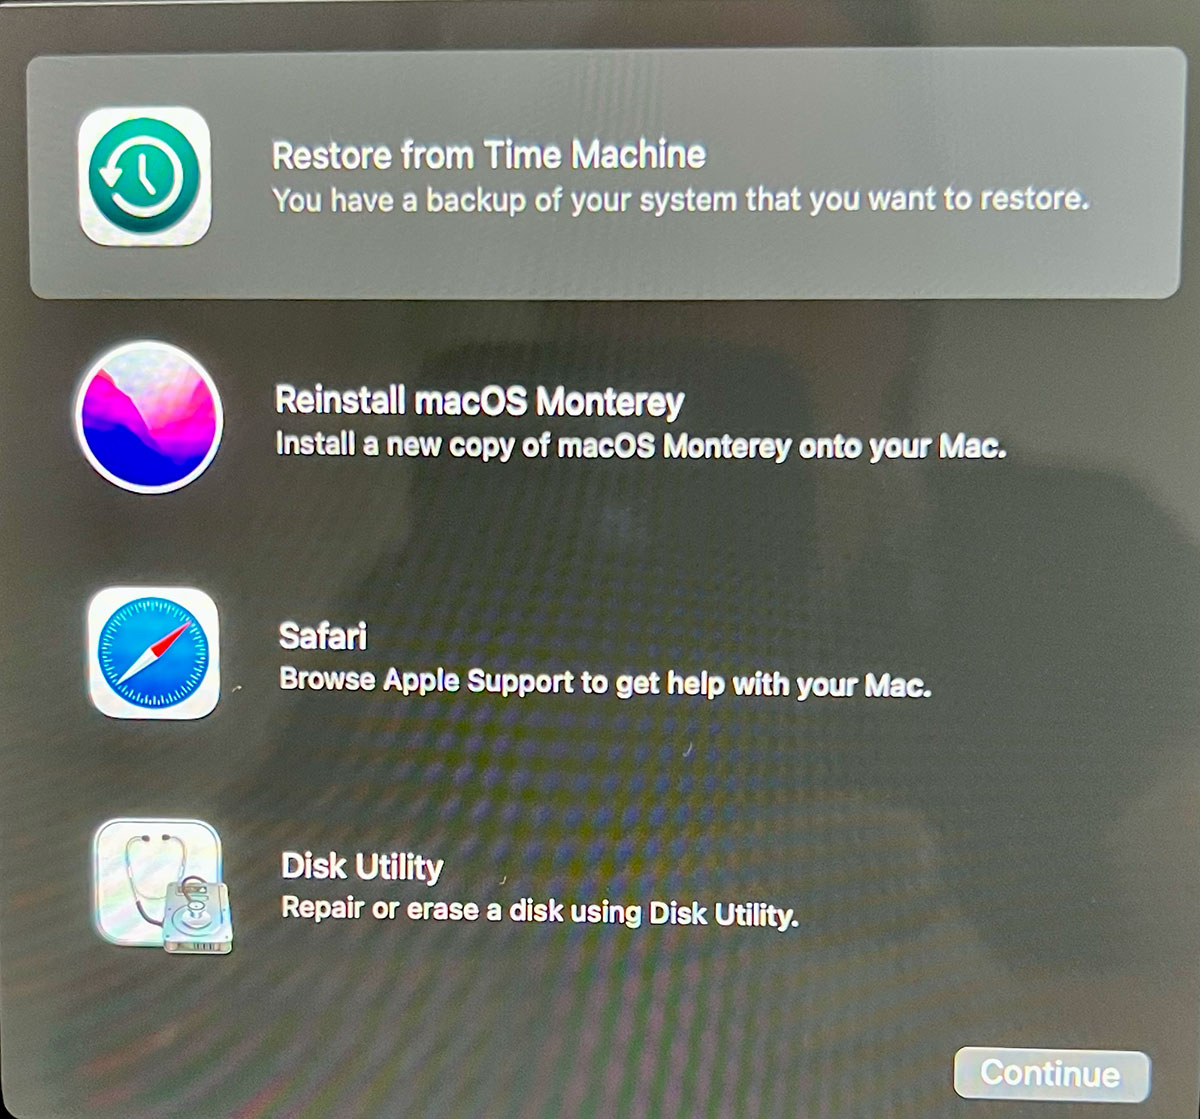
How you can restore a Mac disk from Restoration mode
Foundry
Disk Restoration will not be such a simple choice should you can’t truly begin up your Mac. However, as lengthy because the drive failure isn’t too terminal, a restart in Restoration mode ought to be potential.
Restoration is a partition on the drive that incorporates a model of the macOS that you would be able to boot from. Booting from this partition doesn’t do something to the primary drive, so there’s no want to fret about overwriting paperwork.
- To enter Restoration on an M-series Mac press and maintain the ability button whereas the Mac begins up.
- Maintain holding the ability button till Choices seems.
- Then click on on Choices and click on on the Proceed that seems beneath Choice.
- Choose the disk you wish to recuperate (e.g. Macintosh HD).
- Click on Subsequent.
- Add a password if required.
- Watch for the Mac to begin in Restoration.
- Now you can attempt to repair your drive utilizing Disk Utility as described within the part above.
Notice: If you’re attempting to recuperate an outdated Intel-powered Mac you might want to maintain down Command+R whereas your Mac begins up. Maintain holding these keys till you see both an Apple emblem or a spinning globe. For extra assist, see our full information to utilizing Restoration mode.
For those who do handle as well from Restoration, you’ll want one other drive to recuperate information to. It’s best to plan to get an exterior drive plugged in as quickly as you’ll be able to, to be able to safe your knowledge there.
If Disk Utility manages to repair your drive sufficient to allow you to boot from it once more, be very cautious how you utilize it. When you have misplaced any knowledge, it is extremely necessary to keep away from utilizing the drive, as something that writes information to the drive, could also be writing over your misplaced information. Which might render them unrecoverable.
So should you handle to resurrect your sickly drive, give up all of your software program, together with e mail, to keep away from overwriting any checklist information and fasten an exterior drive and recuperate any misplaced information to there.
How you can recuperate a Mac utilizing an exterior boot drive

Foundry
Older, pre Mac OS X Lion Macs received’t even have Restoration mode, wherein case you would possibly wish to strive booting from an exterior drive working a replica of the Mac OS.
This will likely even be an choice to strive in case you are unsuccessful booting up in Restoration mode on a more recent Mac.
On older, Intel-powered Macs, plug within the boot drive (arrange utilizing the directions linked to above) and press and maintain the Choice key. Then select the exterior bootable drive. With Apple-silicon Macs press and maintain the ability button till the bootable drive exhibits up and select that as your startup disk.
If this works, you’re in a fairly good place to proceed, as you’ll now not be booting from the defective disk.
You possibly can strive working Disk Utility at this level and try to repair the defective drive.
Use knowledge restoration software program to recuperate your Mac arduous drive
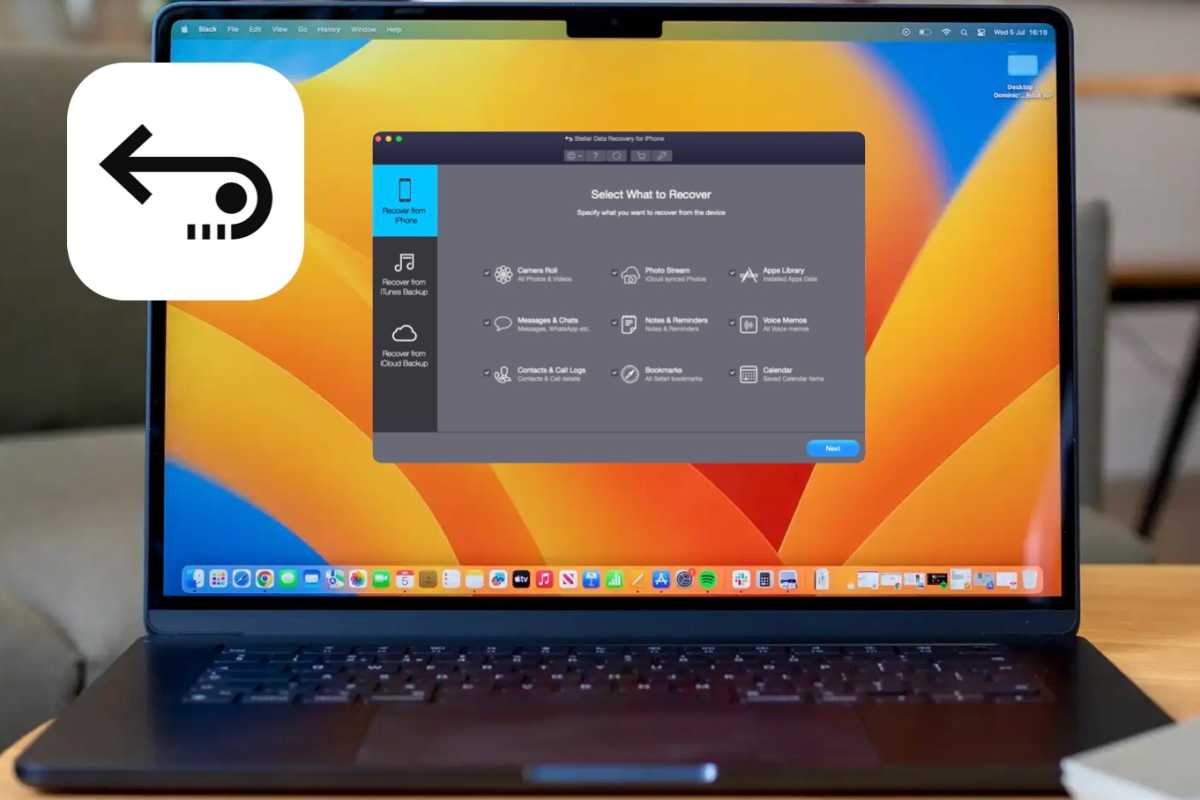
Foundry
Even should you managed to begin your machine from Restoration, or an exterior boot drive, the amount you are attempting to recuperate nonetheless could not present up.
On this case, knowledge restoration software program should have the ability to work with that drive. So long as the OS can nonetheless discuss to it, and the information continues to be on the drive, you continue to have an affordable probability of recovering it.
The annoying factor about knowledge restoration software program is that you just solely actually use it in case you have been caught and not using a backup. The builders have you ever at their mercy, and in case you have misplaced valuable knowledge they might cost no matter they will get away with. However it’s a extremely aggressive market too so the pricing construction has advanced at a type of equilibrium.
The excellent news although, is that builders don’t wish to you spend plenty of cash and then comeback and complain that it didn’t work. Thus a overwhelming majority supply a free model that can scan your disk and see what’s salvageable. You possibly can then resolve of the fragments of your useless drive are definitely worth the {dollars} to retrieve.
All work in an identical approach. If the listing telling the place information have been initially saved is saveable, the remaining is straightforward. But when that isn’t the case, the software program will scan the information for acquainted patterns that may denote a file sort. As soon as they discover as file sort, there’s a superb change that the next knowledge would be the file. Extremely fragmented arduous drives would possibly imply not all information may be retrieved, however given sufficient time, most will get there in the long run.
It may be a time consuming course of to piece the bits of information again collectively. However with persistence, most information that haven’t been overwritten ought to in principle be saveable. If a tough drive continues to be spinning, and the pinnacle continues to be scanning, there’s nonetheless hope. Sickly drives can take days to totally scan, and the upper capability they’re, the longer it can take. But when it’s your wedding ceremony photographs, or maybe your Bitcoin vault that’s lacking, you’ll be able to afford to attend.
We’ve got assessed the highest Mac knowledge restoration apps and we suggest the next choices: Wondershare Recoverit, Stella Information Restoration, Prosoft Information Rescue and CleverFiles Disk Drill Professional.
Eradicating your Mac’s Laborious Drive or SSD
Apple
A closing choice in case you have had no success with the above, and really feel courageous sufficient, is to strive eradicating the arduous drive or SSD.
This won’t be a simple choice in case you have an SSD. If there’s one factor that’s irritated Mac techies in recent times, it’s the truth that since 2016, Mac fashions have arrived with the SSDs soldered onto the logic board. There are each execs and cons to this, however the easy truth is that if the onboard SSD goes south, you’re changing your complete logic board. This additionally places the person within the place of getting to guess what their knowledge wants will probably be and purchase an SSD with a bigger capability than they could initially have thought they wanted, which ramps the worth up a bit greater.
One other main draw back to that is that it’s extraordinarily troublesome to take away the onboard SSD, and until you are feeling comfy soldering and resoldering microcircuitry, it’s not suggested to attempt to take away the unit from the logic board.
If you’re attempting to recuperate an older Mac, eradicating the Mac’s inside arduous drive could also be an choice.
When you have the instruments readily available, you might strive these steps:
- Energy down your Mac.
- Unplug its cables.
- Open its case.
- Discover the interior arduous drive or SSD and thoroughly take away it.
- Put the drive in an exterior USB casing
- Join the exterior drive to a different Mac.
- Mount the drive, and see what knowledge may be recovered from this.
I’ve spent half my tech profession doing this and it normally works out, though it’s reasonably terrifying to open any Mac up for the primary time.
Supplied the arduous drive or SSD is in ok form to mount, this allows you to dive in, hunt down the information you need, and again them up first. Understand that your arduous drive or SSD could also be experiencing mechanical issues at this level, so deal with the drive gently, and attempt to get the important information throughout the first few occasions mounting it, as that is when the drive will probably be in the absolute best situation.
As soon as the important knowledge has been backed up, you’ll be able to return the arduous drive to your Mac or substitute the drive outright and restore the information as wanted later.
In conclusion, should you don’t want knowledge restoration proper now, then do your self an enormous favour and ensure your backup technique is up and working and idiot proof. A bit ache now will prevent a world of damage sooner or later. When you have already misplaced some knowledge, then the method outlined right here will assist. However with out wishing to pour salt within the wound, now could be a extremely good time to try your back-up technique. You’ll find a really complete backup technique right here: How you can again up your Mac.
For extra recommendation about backing up your Mac see our spherical ups of the Greatest cloud storage providers and Greatest backup software program for Mac.
