
Should you’re like me, no feeling fairly measures as much as that of being out on the open water. I like water sports activities, so after a good friend took me out kayak fishing a few years in the past and confirmed me firsthand the varieties of massive fish I might catch two miles out on the ocean I made a decision to spend money on my very own kayak that I might outfit for fishing.
I’m a really DIY particular person, so there was no query in my thoughts about how I’d go about turning my dream into reality– I’d construct it myself, or at the least as a lot of it as potential.
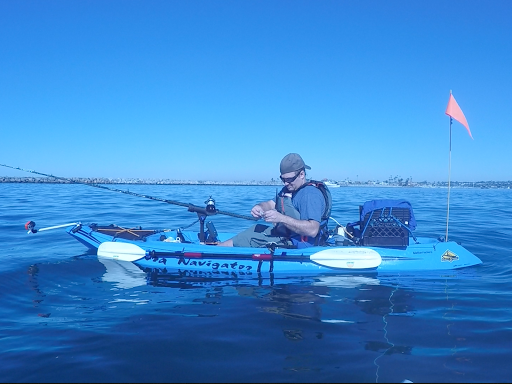
Kayaks themselves are sometimes way more simply bought than made, so I used a Craigslist app to robotically notify me when the search time period, “kayak” introduced up a lead to my value vary. It took some time for a good posting to match my price range, however ultimately, my persistence paid off, and the app notified me about an important deal on a 12-foot blue Cobra Navigator for $300, so I snagged it.

Me and my customized rigged kayak that has many 3D printed elements
Now that I had the kayak it was time to outfit it for fishing. There are such a lot of choices and equipment obtainable for the game, so I started by visiting the web sites of respected kayak and fishing sellers, lots of which had an “final kayak fishing setup” picture or article that confirmed each accent that I’d or might must get me out on the water in type. I in contrast a number of of those and recognized the commonest parts in addition to some outliers that had been both nonessential or simply for luxurious. Sure options I made a be aware of so I’ve choices once I get the urge to improve.
As I did this, I created a list spreadsheet and denoted whether or not a element was vital or not, and took be aware of any half that seemed one thing I might manufacture myself. Because the listing (and price range) grew, I needed to decide which elements can be price the price of shopping for a commercially-available model and which of them I’d have the ability to make. On the identical time, my thoughts was racing by means of a wishlist of options that might be cool to have, and a few nice brainstorming occurred as I explored the scope of how I wished my kayak to look.
Concerns
The choice of producing the elements myself vs. shopping for new got here right down to the next components of consideration: price, customization, known-good-but-complex designs, and instantaneous gratification. My purpose has been to construct one of the best boat potential with the facilities I need on as small a price range as potential, all in time for the subsequent fishing season (which begins in March in Southern California). I’ve been prepared spend a bit of extra on sure objects if I feel the fee is warranted however often strive a DIY model first if I see adequate construct directions and constructive suggestions about it on-line.
Testing the prints on the open water
Price
Some elements are low cost and simple to get. If that’s the case, I most likely received’t spend my time making them. Then once more, I would simply save the small price and churn a number of out rapidly if I can discover a mannequin that’s able to print. If I’ve to design it myself too, that can weigh on my determination.
Customization
I wish to make my boat the best way I need it. I refuse to sacrifice options which are essential to me if I’m going to be the one utilizing it, so if I can’t discover a ready-made model on the market, I’ll think about designing it. If no such product even exists, it’s as much as me to make the factor myself.
Good, however complicated designs
Some merchandise are the results of years of improvement, and I’m not going to fake that I can do it higher than the engineers. On the subject of shopping for a product that can save me hours of time or frustration I think about scoping out the choices.
Immediate Gratification
Together with the consideration of the time concerned in making a sure factor, generally life will get in the best way, and timelines don’t enable for its creation the best way I need it. If I can’t anticipate a factor till I get round to constructing it, I’ll simply purchase it.
Iterative Design
As soon as I had a longtime plan for what I wished to do, I started sifting by means of the listing of elements I created, and my path grew to become clear. I used to be capable of determine which elements I would want to print, and which elements I would want to purchase. Once I began work on creating the elements I wanted to print, the true enjoyable started.
The method of making these or any 3D printed elements begins with an thought. The thought is your desires, hopes, and objectives, and it manifests by means of you and the instruments you employ to create the top consequence. It’s important to know your skillset and the talents of your instruments nicely sufficient that you just’re assured utilizing them to their full potential. Should you don’t know the way a device works, you most likely received’t have the ability to use it accurately, and that may inhibit the inventive course of.
With a stable set of instruments at your disposal, you’ll be able to then create. Remember that issues don’t all the time prove the best way you hoped, so the flexibility to adapt a design or repair an issue is crucial if you’re making one thing your self. Within the context of 3D printing, the printer is the principle device for creating the uncooked construction, however as soon as that’s full, you could want to change the design or make slight modifications to make it work the best way you need.
Upon getting a printed half, strive utilizing it as you supposed. Does it match accurately? Is it sturdy? Can it deal with unintended pointless power? Make the half move a take a look at you create for the way you plan for it to carry out, bearing in mind potential issues or pitfalls. Does it want {hardware} to operate accurately? These and different questions on your purpose for the half will show you how to determine whether or not the half is nice as is or if that you must make one other model with enhancements. If enhancements are vital, make them after which undergo the identical checks and questions till you’re glad.
In the end, you need to be assured within the half’s capability to perform– and also you try this by means of the testing course of I described along with utilizing it in an precise manufacturing atmosphere. In my case, if a component doesn’t work it means I might lose performance whereas out on the ocean, which is rarely a superb state of affairs. Having backups and redundancies will decrease the potential for failures. Because of this, I take my kayak out often to check the elements I make to make sure they’ll work for me when the time involves do some actual fishing.

Ready for the fish to chunk
Printed Elements
Customized Designs
Anchor Trolley
This piece of apparatus is used to permit the anchor to maneuver alongside the aspect of the boat in order that the anchor line tethers at both the bow or stern relying on the present and which course you wish to fish. The meeting is made up of a plastic hoop, 5 line guides, two chrome steel pulleys, and about 20 ft of 4mm paracord. Commercially-available trolley methods are sometimes product of injection-molded plastic and could be expensive for what they’re relative to a 3D-printed model. My model is fairly easy and less expensive, although I haven’t fairly been capable of get the pulleys to spin as properly as I would love. It’s not detrimental to the design; it simply requires a bit of further power to maneuver the trolley when a pulley doesn’t spin freely.
Discover the half right here.
Anchor Trolley
Pad Eyes
Together with cleats, a typical merchandise for anchoring strains and bungee cords is a pad eye. It’s primarily only a small loop by means of which line could be tied or run. My kayak had a number of already put in once I purchased it, however I wished extra so I reverse engineered one in CAD so I might print them out as wanted.
Discover the half right here.
Pad Eyes
Fishfinder/Compass Mount
My kayak already had a Scotty mount put in in entrance of the seat once I purchased it, so I figured I’d simply go together with that system when it got here to including different mounts for fishing equipment as a substitute of ranging from scratch. I purchased an extra Scotty mount which I put in proper in entrance of the present mount, so I now have two: one for holding the rod holder, and the opposite for one in all my favourite designs, the customized fishfinder/compass mount. It’s designed particularly to suit my Lowrance fish finder and a compass. This half is an ideal instance of customizability which you can’t simply purchase.
Discover the half right here.

Fishfinder/compass mount
Flagpole
NOTE: This isn’t a printed half, however since different printed elements straight depend on its design I figured I ought to hyperlink to the product I used.
My private feeling is that each boat deserves a flagpole. Flags are for communication, and in case you don’t have a flag, nicely, you simply can’t talk as successfully as you’d have the ability to in case you had one. In my case I simply need different boats to know I’m there, so I’ve a brilliant orange triangular flag up on a regular basis. I even have snorkeling gear, so I’ve a dive flag in case I wish to take a dip.
The flagpole I exploit is a sturdy fiberglass driveway marker from Dwelling Depot: http://www.homedepot.com/p/Blazer-Worldwide-Driveway-Marker-48-in-Spherical-Yellow-Fiberglass-Rod-381YDM/202498050
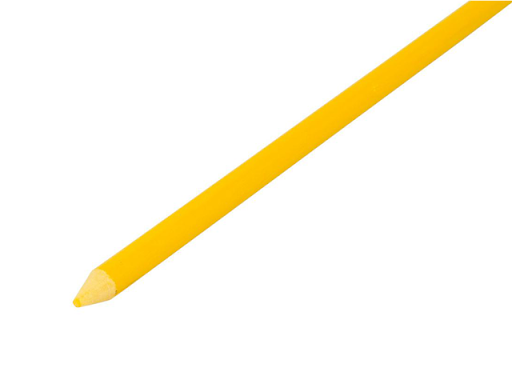
Flagpole
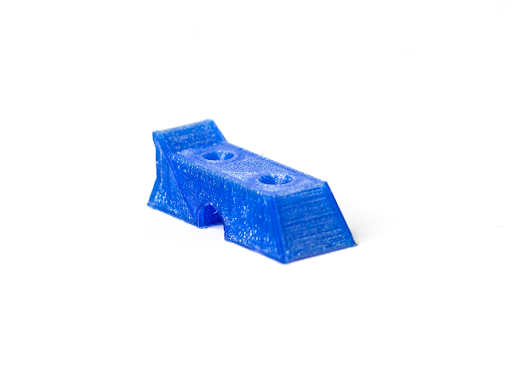
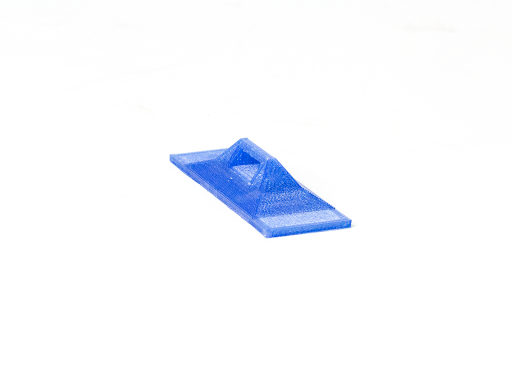
Pole Mount
I wanted a strategy to mount the flagpole to the again of the kayak. I designed a mount that has a nicely for the underside of the pole to take a seat in, and it’s connected to the hull with three screws. I had to make use of a warmth gun and make the opening a bit of bit smaller, so the pole suits very cosy and makes that *mpop* sound once I pull it out.
Discover the half right here.
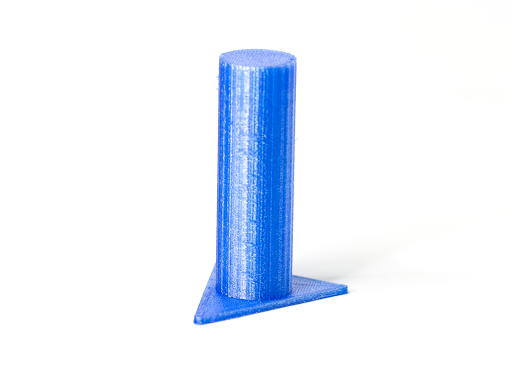
Pole mount
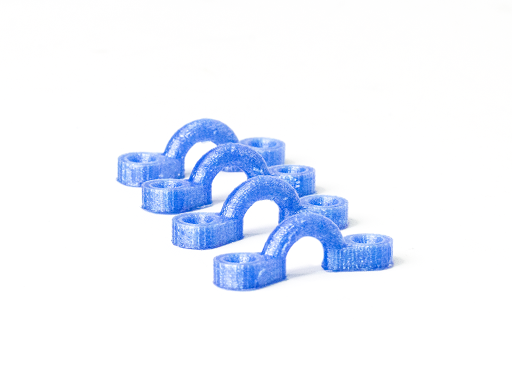
Flag Holder Loops
These small elements slide up onto the pole and maintain the flag(s).
Discover the half right here.
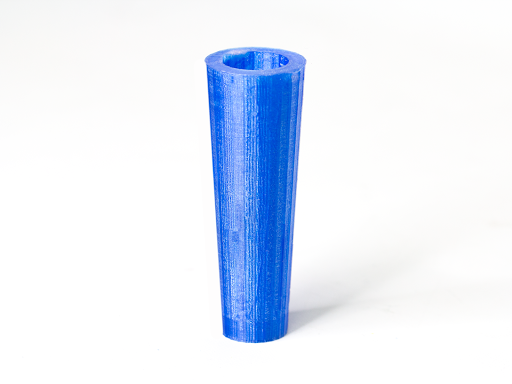
Digital camera Mount
On the highest of the flagpole I wished to have an motion digicam, so I needed to design a mount to suit. Sooner or later, I wish to add a battery-powered 360-degree white LED gentle to the equipment so I’ve the choice to make use of the kayak from nightfall till daybreak (as is required by California legislation).
Discover the half right here.
Scupper Plugs
The Cobra Navigator kayak is a sit-on-top, and I don’t like consistently resting my ft in a few inches of water, so I printed a number of scupper plugs to maintain water from coming in by means of the underside of the kayak. After all, water is available in over the edges often, so I’ve a big sponge to bail with.
Discover the half right here.
Scupper plugs
Battery Field Belt Loops
I used some leftover 3D printer belt to safe the 2 12-volt batteries contained in the utility field I purchased to carry them. I needed to design and print some customized loops to safe the ends of the belt to.
Discover the half right here.
Battery field belt loops
Anchor Line Reel Deal with
I used an empty filament spool for a reel, then designed and printed one of many two handles for it. I sculpted the opposite deal with from MatterMorph so it could completely mould to the form of my hand.
Discover the half right here.
Anchor line reel deal with
Others’ Designs
Whereas I designed the elements above (which you could find without spending a dime within the design library right here), there have been already some nice designs obtainable on-line that match my wants completely.
Paddle Clips
Once I lastly attain my vacation spot and wish to do some fishing, I don’t wish to have to carry the paddle or preserve it in my lap, so I printed these paddle clips that preserve the paddle connected to the aspect of the kayak. I additionally made a smaller pair to carry my gaff.
Factor: http://www.thingiverse.com/factor:420343
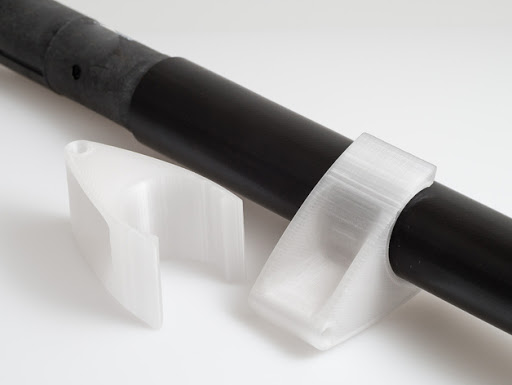
Paddle clips
Cleats
Any good boat has plenty of cleats for tying off rope or line. This cleat design prints nicely and I’ve three complete on my kayak. One on the again is the beginning and finish for my perimeter deck line, and the 2 on the entrance are for tethering varied different objects just like the fishing pole and gaff.
Factor: http://www.thingiverse.com/factor:63053
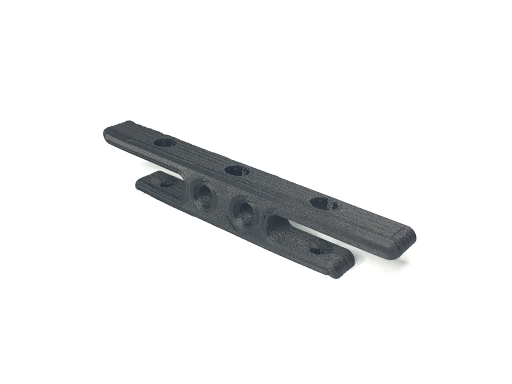
Cleats
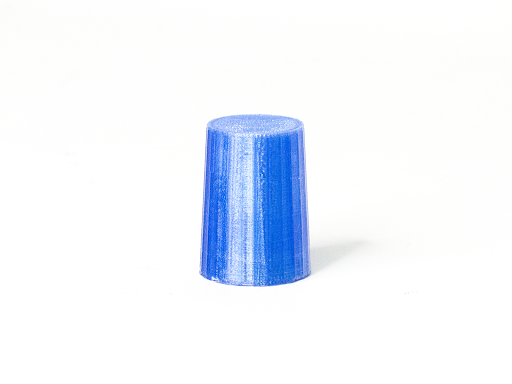
Further Scotty Rod Holder Knob
The rod holder I purchased has a knob, and I most likely don’t want a backup, however I noticed it on Thingiverse and wished to make one only for the heck of it since I like practising with warmth set finishes.
Factor: http://www.thingiverse.com/factor:1259205
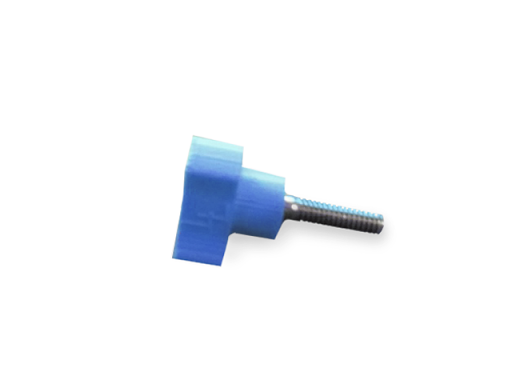
Scotty Rod Holder Knob
3D Printer Filament
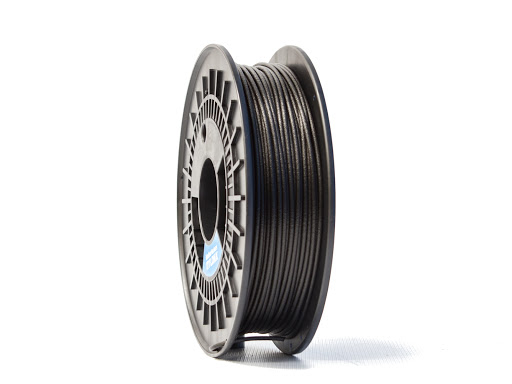
On the subject of 3D printing elements that may face up to the weather, I like PRO Sequence PETG or Nylon filament. ABS filament additionally works nicely, however for me, it’s sufficient of a problem to print with that I hunt down options. To be truthful, Nylon filaments are additionally a problem, however I’ve been capable of mitigate sufficient of the damaging results related to printing it that I can use it for some prints.

MatterHackers PRO Sequence PETG Filament
I printed the vast majority of the elements utilizing the MatterHackers PRO Sequence Translucent Blue PETG, however for the cleats and a number of the pad eyes, I used our new NylonX 3D filament, which is Nylon bolstered with floor carbon fiber. It’s very laborious however versatile, so it received’t break if sudden power is utilized.
NylonX 3D Filament
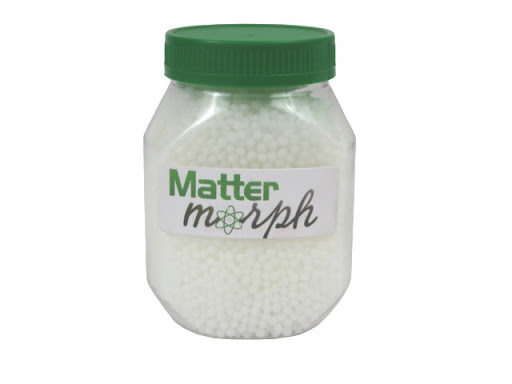
For one half, specifically, I wished a deal with that kinds to the form of my hand, so I used MatterMorph to create it. MatterMorph will not be a 3D printing materials per se, however moderately are plastic pellets constructed from a cloth that has a low glass transition temperature which makes them straightforward to soften in a glass of scorching water. Then, because the pellets clump collectively and turn into extra malleable, they flip right into a shapeable medium like clay or play-doh. When cooled again right down to room temperature, the shape hardens and may be very sturdy.
Put up-Processing
Perform over type is my mantra. Usually I’m much less involved about how one thing seems than I’m about its efficiency, and in terms of 3D-printed elements, that is very true. Because of this, my elements don’t all the time look nice, however they’re made to resist heavy use and abuse. I could be clumsy at instances, and there’s an excellent motive I’ve an costly telephone case for my iPhone. I’m laborious on my issues, and for me, if a factor can’t stand as much as my utilizing it then it’s most likely not for me. Sadly, this has traditionally meant that I can’t have some good issues, however in terms of boating the ocean’s going to be a lot laborious on these things so I determine it’d as nicely have the ability to face up to each of us.
The plus aspect of not caring about seems is that I could make modifications to issues that don’t essentially look good however are fairly useful. It additionally units my aesthetic commonplace decrease, however that’s a value I’m prepared to pay for the reason that final purpose for a fishing boat is catching fish, and it doesn’t must look good for me to do this.
For instance, the connector a part of the fish finder/compass mount I made out of ColorFabb XT didn’t print fairly accurately. As a substitute of printing the entire thing once more, I opted to restore the troubled areas utilizing a MatterHackers Artful Pen (by hand). The consequence seems fairly terrible, however since it really works and my fish finder isn’t going to be thrown overboard if the kayak unintentionally flips I’ll use it– at the least till I’ve a necessity for a unique mount.
One other instance is the flagpole mount. I wished the flagpole to suit so cosy that it wouldn’t have an opportunity to come back out if the kayak flipped (the last word worst-case state of affairs). After printing, the match was a bit of unfastened, so I used a warmth gun to melt the PETG and was capable of make the opening simply the best dimension by molding it with my palms. The result’s a really good *mpop* sound when it’s eliminated, indicating that the match is air-tight.
A Fast Repair
Through the writing of this text I introduced my kayak and all of the gear into the MatterHackers workplace to take footage, and by the way one of many plastic items on a leash broke. It’s a superb leash in any other case, so moderately than throw it away, I designed a substitute in Blender and printed it out.
The entire course of took a number of hours, however it saved me some money and was a superb alternative to apply my CAD abilities. Extra skilled customers might most likely do it in a lot much less time. In any case, I’m fairly proud of the consequence.
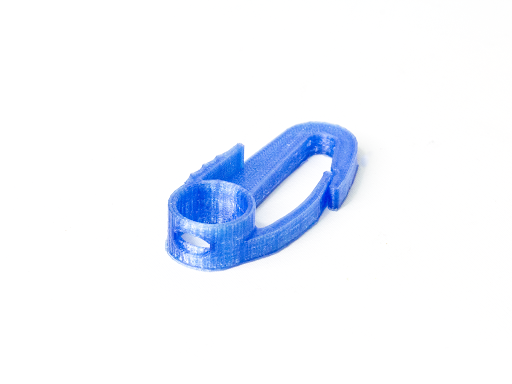
Customized clip for the leash that broke
Make It Your Personal
So now that you just’ve seen the fundamental course of behind my kayak buildout, you will get to work by yourself undertaking. Have enjoyable, discover all of the choices, and most significantly: make it your individual! With 3D printing and MatterHackers behind you, you can also make something.
Completely satisfied printing!
