
If there’s one factor Apple’s good at, it’s constructing working programs which might be easy to make use of and filled with intuitive options. A primary instance of that’s its assortment of Mac trackpad gestures, which allow you to work your manner round macOS with just some breezy swipes.
You would possibly already know a number of key trackpad gestures, like pinching to zoom or utilizing two fingers to scroll. However look just a little nearer and there are various extra little-known gestures that may severely stage up your macOS expertise. Right here, we’ve detailed 9 of the perfect Mac trackpad gestures that offer you new powers to manage your laptop.
Cover all different apps (App Exposé)
Apple
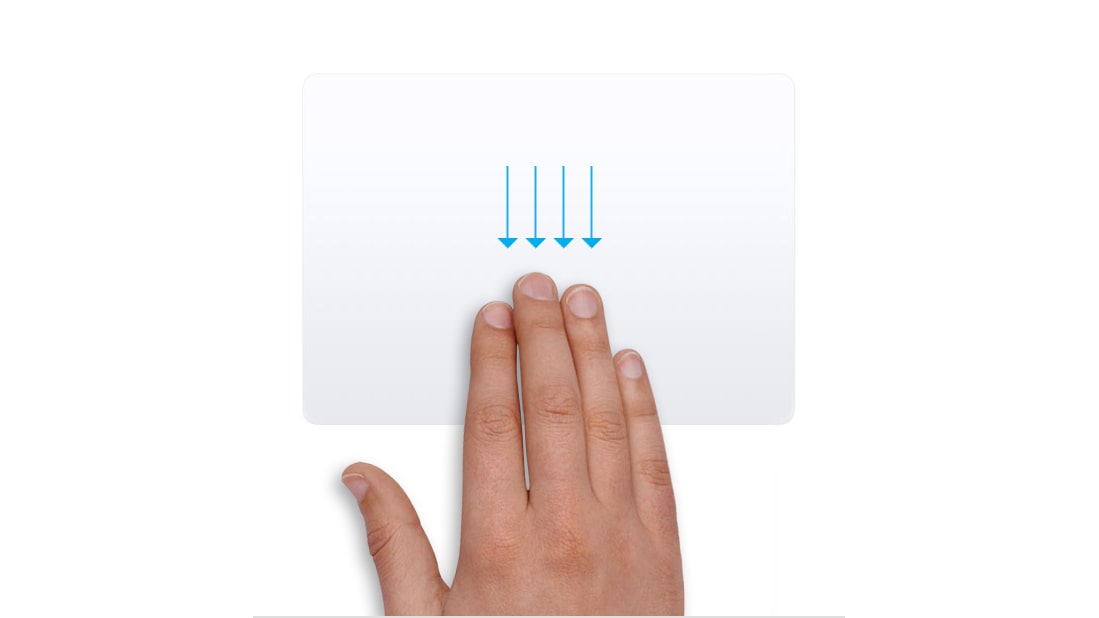
If you’re actually knee-deep in a mission in your Mac, you’ll be able to shortly end up with a number of app home windows clogging up your display screen. Managing all of them could be a ache, however there’s a straightforward option to do it: use App Exposé.
With a fast swipe, this characteristic will conceal all home windows besides these belonging to the presently energetic app. That offers you a speedy option to see what number of home windows a selected app has open and to modify between them. In addition to that, you’ll see a row of latest paperwork alongside the underside of your display screen, so you’ll be able to open them with out having to root round in folders on the lookout for them.
App Exposé is turned off by default, nevertheless it’s one of many first issues I allow each time I get a brand new Mac. To take action, open the System Settings app and go to Trackpad > Extra Gestures. Subsequent to App Exposé, select both Swipe Down with Three Fingers or Swipe Down with 4 Fingers from the dropdown menu.
Mission Management
Apple
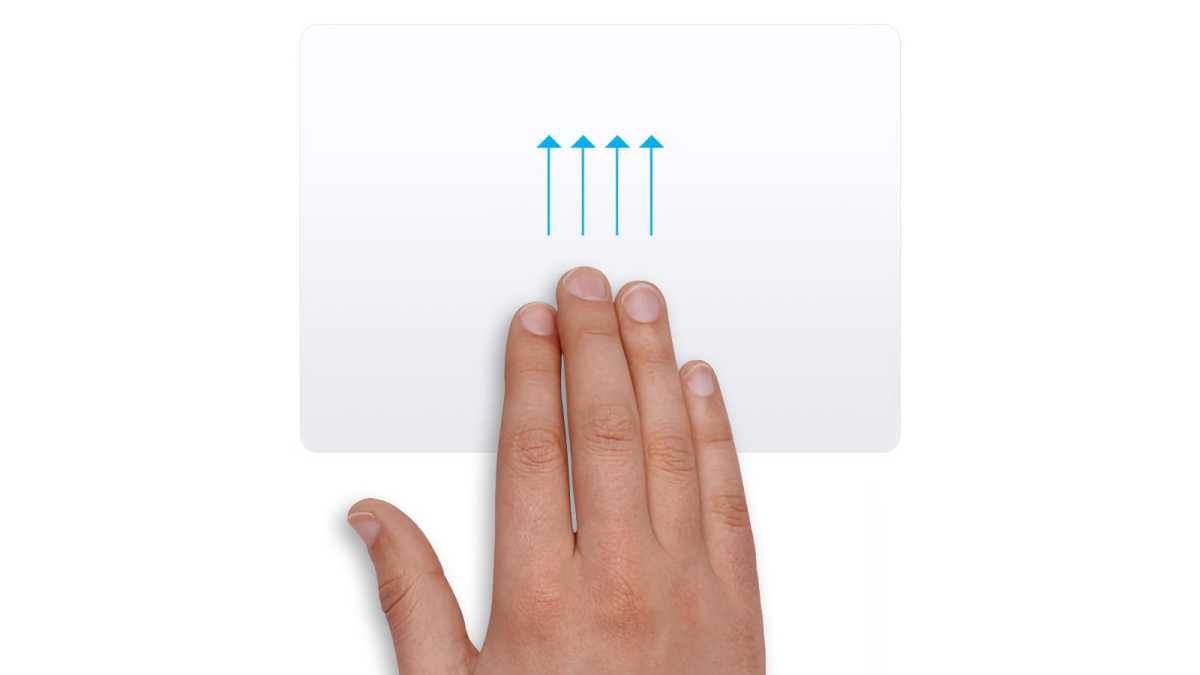
Whereas App Exposé requires a downward gesture, swipe 4 fingers upward in your trackpad and also you’ll activate Mission Management, which is enabled by default. It’s a useful characteristic for when you’ve an app-laden desktop, however as a substitute of hiding every little thing besides the energetic app, Mission Management exhibits all of your open apps and home windows in a single view. Which means you’ll be able to change to the app you want with out having to repeatedly faucet Command-Tab.
Mission Management can be helpful for viewing and switching to totally different digital desktops (also referred to as desktop areas). Swipe 4 fingers as much as launch Mission Management, and your energetic desktops seem in a row on the prime of your show. You’ll be able to flip between them, add a brand new desktop, or take away any that you simply’ve created. Be taught extra about Mission Management.
Change desktops and full-screen apps
Apple
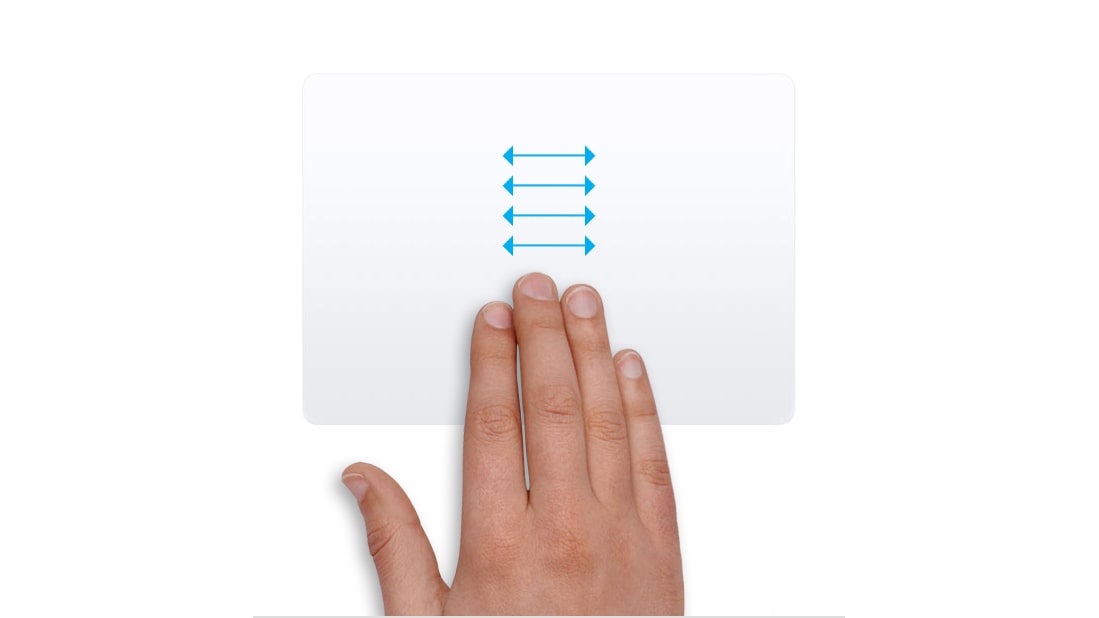
Talking of digital desktops, you don’t want to make use of Mission Management to see them; a easy trackpad gesture will do the trick. When you’ve created a couple of desktop, swipe 4 fingers left or proper to modify between them. That’s a lot sooner than launching Mission Management, discovering the precise desktop, then clicking to open it.
The identical gesture works for full-screen apps, too. If you’re in a full-screen app, swipe 4 fingers throughout your trackpad to maneuver between different full-screen apps and your digital desktops. Every full-screen app occupies its personal digital desktop house, which you’ll see by opening Mission Management.
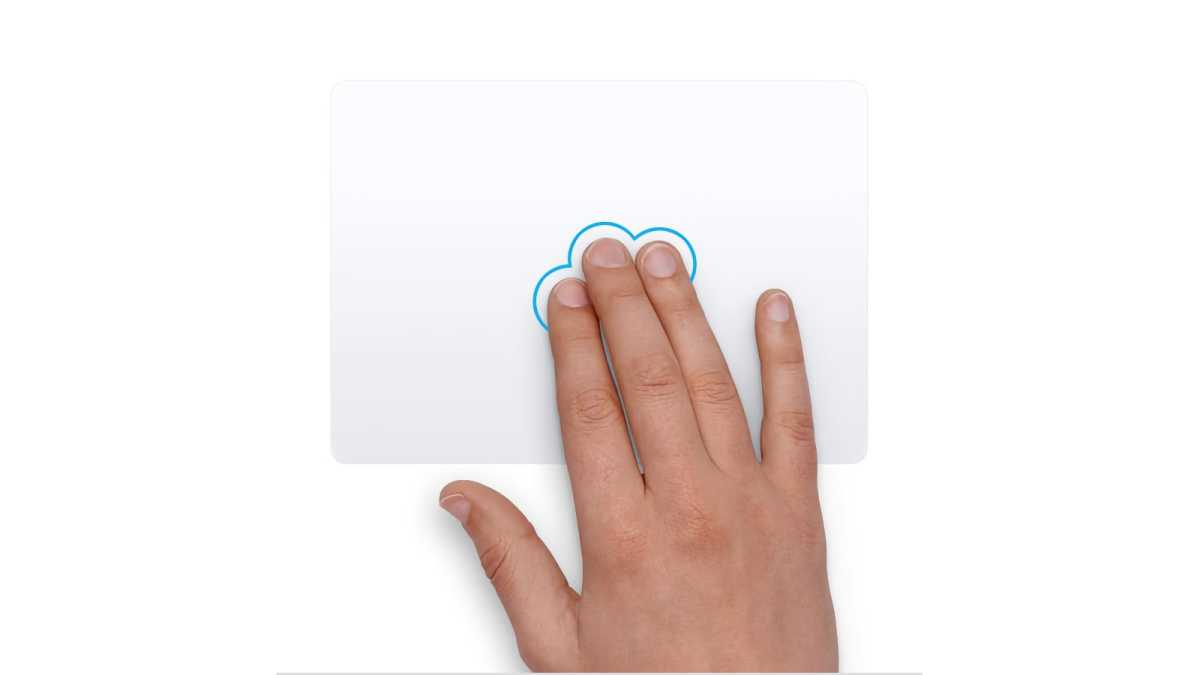
Present your desktop
Apple
When your Mac is cluttered with open apps, it’s a ache to reduce all of them one after the other to get to your desktop. As a substitute, simply place three fingers and your thumb shut collectively in your trackpad, then unfold them aside. All of your apps will raise away to disclose your desktop.
You’ll be able to cleverly pair this gesture with a mouse when you have one in your Mac. For example, unfold your fingers in your trackpad to cover your apps, then click on and drag a file situated in your desktop. Whereas nonetheless holding your mouse button down, pinch your fingers collectively once more in your trackpad. This course of helps you to conceal your apps, choose up a file, then convey your apps again and drop the file into an app of your alternative.
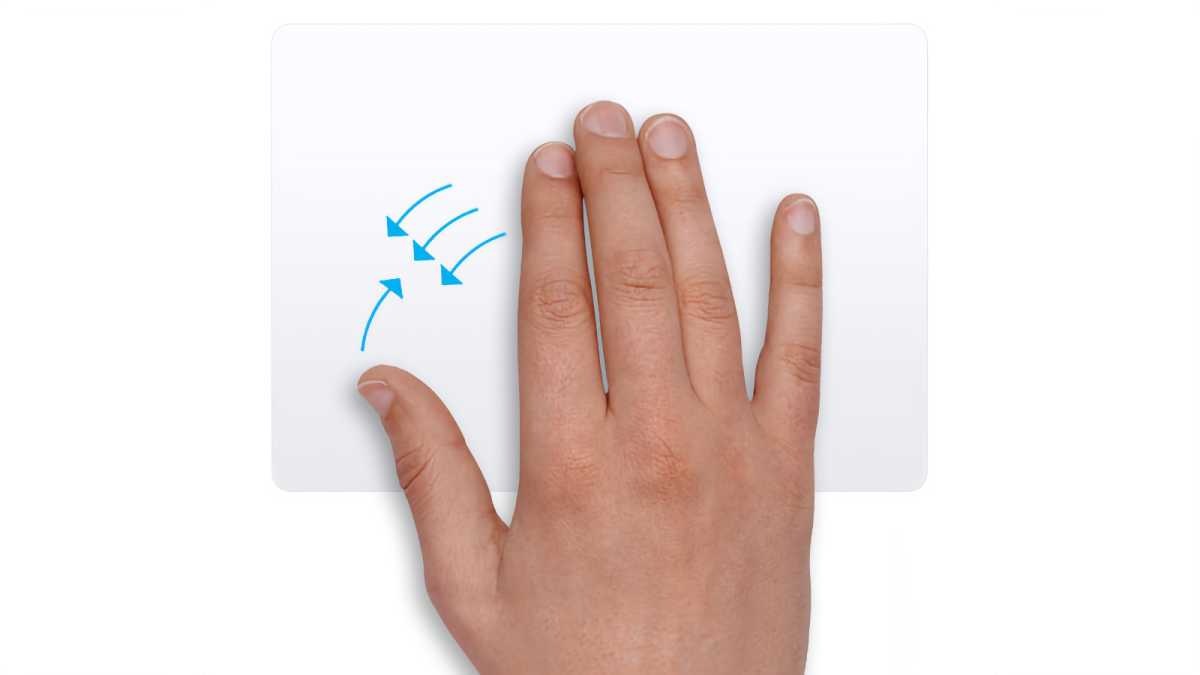
Discover apps shortly utilizing Launchpad
Apple
Whereas shifting your thumb and three fingers aside exhibits your desktop, doing the alternative motion–beginning three fingers and your thumb huge after which pinching them collectively–is a fast option to open Launchpad.
This can be a grid view of all of your put in apps, and it helps you to open them shortly with out delving into the Purposes folder. You’ll be able to organize apps nevertheless you need and manage them into folders to neaten issues up. And with this gesture, they’re only a fast swipe away.
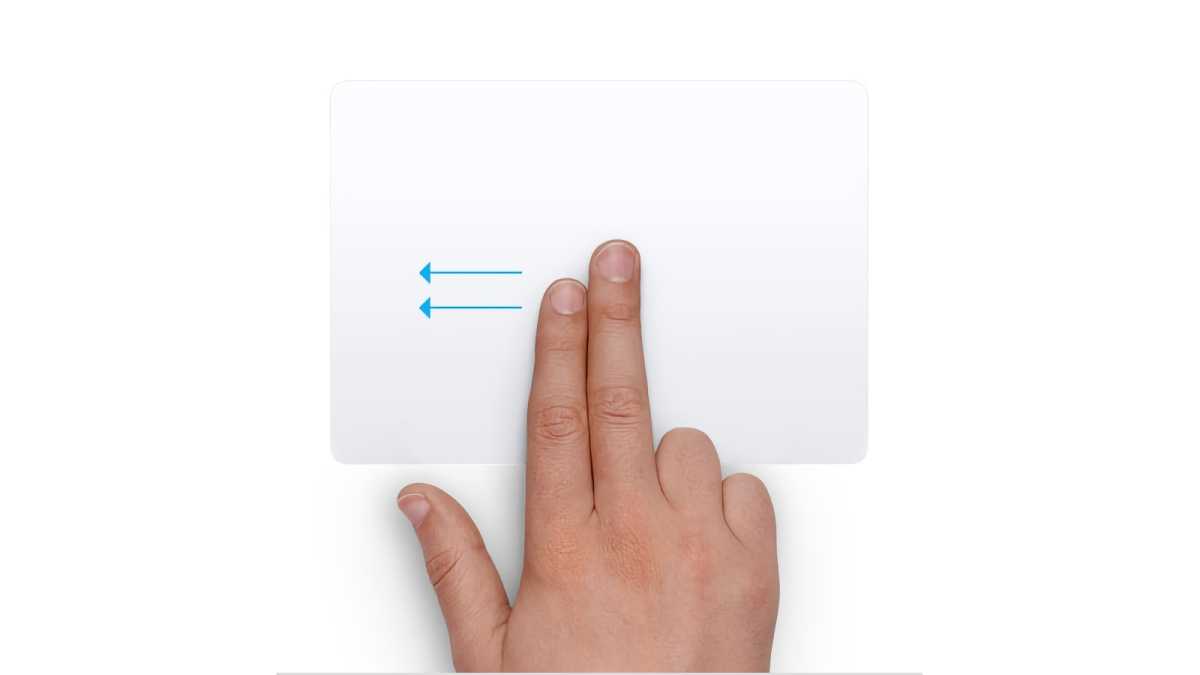
Open Notification Middle
Apple
Heard of the Notification Middle? It’s a devoted widget space that may home a clock, a calendar, a climate forecast, and extra. It lives off-screen in your Mac and may be summoned by clicking the time and date in your show’s top-right nook. It’s an underused a part of macOS, nevertheless it’s a useful manner so as to add a number of widgets into the combo with out having them completely sitting in your desktop.
Whilst you may activate the Notification Middle by clicking your Mac’s date, you too can convey it out of its hiding place with a gesture. Transfer your mouse pointer to the right-hand fringe of your display screen, then swipe from proper to left with two fingers. It will drag the Notification Middle out into the open. To place it again, simply swipe from left to proper or click on on any a part of your show. Be taught extra about Notification Middle.
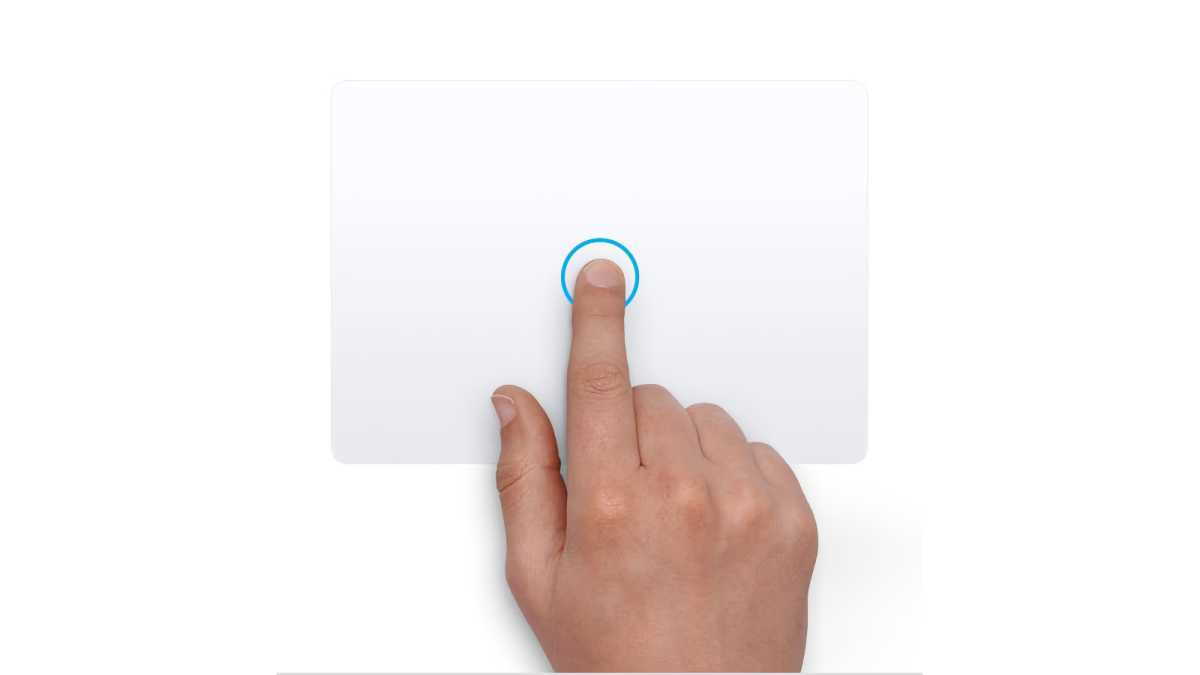
A greater option to transfer information
Apple
If you wish to drag and drop a file from one aspect of your show to the opposite, issues can get just a little tough with a trackpad, and it’s not unusual in your fingers to bump up in opposition to the trackpad’s edge earlier than you’ve completed shifting your file. Fortuitously, there’s a characteristic that may assist make this rather less fiddly.
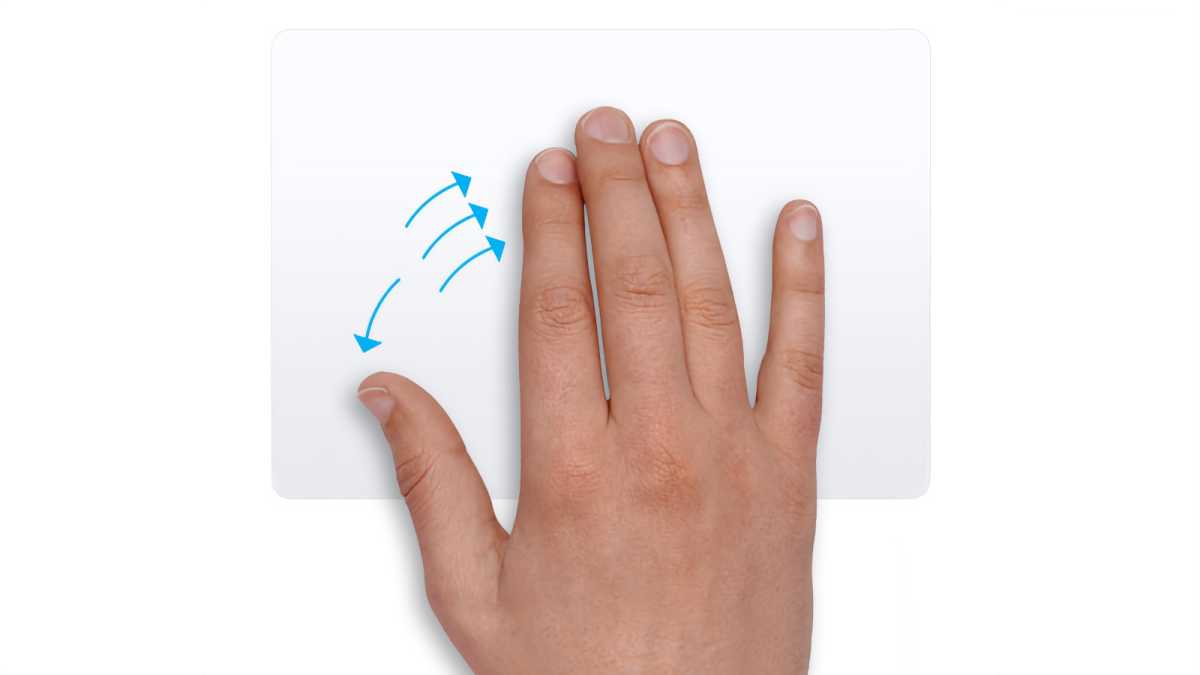
Open the System Settings app and navigate to Accessibility > Pointer Management > Trackpad Choices. Subsequent, allow the toggle subsequent to Use trackpad for dragging. Now, choose an choice from the dropdown menu subsequent to Dragging type.
Should you choose With out Drag Lock, you’ll be able to double-tap a file, then, with out lifting your finger after the second faucet, transfer it, and it’ll “stick” to your pointer. Increase your finger to launch the file. The With Drag Lock choice is analogous, besides you don’t must maintain your finger pressed on the trackpad. As a substitute, double-tap a file and will probably be connected to your pointer; you’ll be able to then click on to drop it. Three Finger Drag is the ultimate choice (pictured above), and it helps you to drag a file by shifting it with three fingers, no tapping required.
Lookup phrases and handle dates and numbers
Apple
Many apps in macOS are sensible sufficient to mechanically detect issues like cellphone numbers, e-mail addresses, road addresses, dates, and occasions, then offer you choices on easy methods to handle that knowledge. For instance, kind an tackle into the Mail or TextEdit apps, and also you would possibly see a dotted field seem across the tackle whenever you mouse over it. Click on the arrow that seems and also you’ll get choices so as to add the tackle to your contacts, view it in Maps, and extra.
As a substitute of making an attempt to click on this small arrow, you’ll be able to activate these contextual particulars (often known as knowledge detectors) with a gesture. In System Settings, go to Trackpad > Level & Click on, then subsequent to Lookup & knowledge detectors, select both Pressure Click on with One Finger or Faucet with Three Fingers. If you subsequent carry out the gesture over a chunk of appropriate textual content, you’ll activate the information detector.
Not all knowledge detectors present a dotted field and an arrow. Hyperlinks in internet pages, for instance, will present a preview of the linked web page whenever you use your chosen knowledge detector gesture on them. Or you’ll be able to spotlight a phrase, then use the information detector gesture on it to lookup a definition of what it means.
Word that you simply may need to allow knowledge detectors within the first place. To take action, open an app and discover Edit within the menu bar, then go to Substitutions and click on Information Detectors.
